前面有一篇博文iOS学习之Tab Bar的使用和视图切换 这是在AppDelegate里使用Tabbar,这样的程序打开就是TabbarView了,有时候我们需要给程序做一些帮助页面,或者登录页面,之后才跳转到tabbar
View里,或者后面的页面才使用Tabbar的,那这样怎么实现呢?
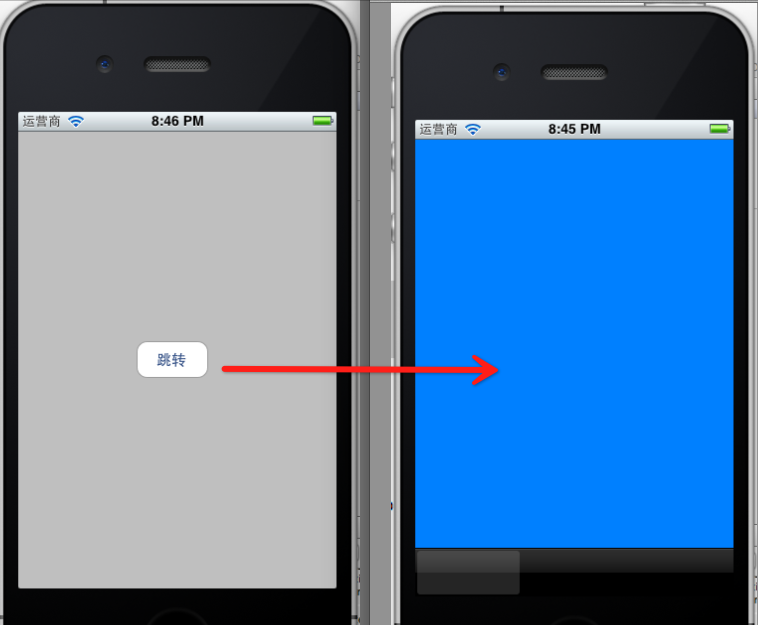
我们建立一个视图,然后在这个视图通过[selfpresentModalViewController : tabBaranimated:YES];跳转来实现。
当程序中需要在多个View直接切换的时候,可以使用 UINavigationController,也可以用 ModalViewController。UINabigationController 是通过导航条来切换多个 view。而如果 view 的数量比较少,且显示领域为全屏的时候,用 ModalViewController 就比较合适(比如需要用户输入信息的view,结束后自动回复到之前的view)
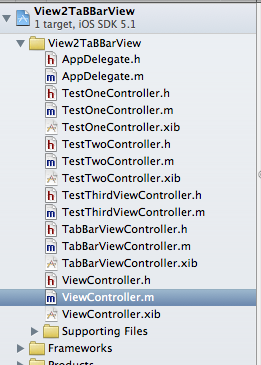
1、新建一个Single View app,按Command + N新建三个ViewController ,都选上.xib文件。
1.1 新建的Controller分别是:TestOneController TestTwoController TestThirdViewController ,他们都继承UIViewController。

单击xib文件,在.xib文件的属性窗口里修改View的颜色,这样好在切换页面的时候区分出来是切换了页面。
好吧,我的ThirdViewController没有xib,可能是漏了,不过也没关系,一样能用。
1.2 添加TabBarViewController
最重要的是再添加一个TabBarViewController,这个需要继承的UITabBarController
2、在ViewController也就是程序进来的第一个页面。在这里添加一个跳转的Button,并加上Action,然后在Action里实现跳转到tabbar.
ViewController.m里实现代码。这就跳转,把刚才建立的三个ViewController都添加到Tabbar里
- - (IBAction)gotoTabbarVIew:(id)sender {
- NSMutableArray *items = [[NSMutableArray alloc] init];
- TestOneController *testOne1 = [[TestOneController alloc] init];
- [items addObject:testOne1];
- TestTwoController *twoController = [[TestTwoController alloc] init];
- [items addObject:twoController];
- TestThirdViewController *thirdController = [[TestThirdViewController alloc] init];
- [items addObject:thirdController];
- // items是数组,每个成员都是UIViewController
- TabBarViewController *tabBar = [[TabBarViewController alloc] init];
- [tabBar setTitle:@"TabBarController"];
- [tabBar setViewControllers:items];
- [self presentModalViewController : tabBar animated:YES];
- }
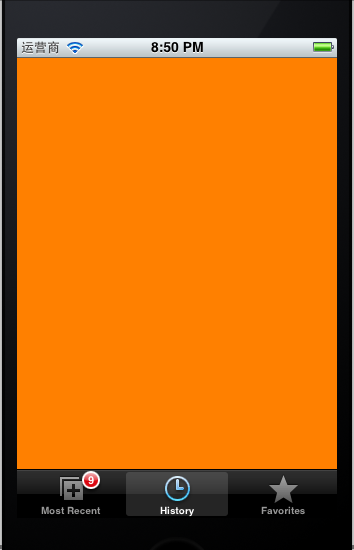
这样运行跳转到TabbarView里的了,但是现在的tabbarView里面的三个Tab 按钮都空白的黑色。怎么添加图标和其他样式呢?

3、添加UITabBarItem
在三个ViewController.m文件里添加对应的UITabBarItem,代码如下
- - (id)initWithNibName:(NSString *)nibNameOrNil bundle:(NSBundle *)nibBundleOrNil
- {
- self = [super initWithNibName:nibNameOrNil bundle:nibBundleOrNil];
- if (self) {
- UITabBarItem *item = [[UITabBarItem alloc]initWithTabBarSystemItem:UITabBarSystemItemMostRecent tag:1];
- self.tabBarItem = item;
- self.tabBarItem.badgeValue = [NSString stringWithFormat:@"%d",9];
- }
- return self;
- }
UITabBarSystemItemMostRecent这个item的风格常量,可以根据喜好改变。除此之外还可以用自定义的图片做为item。这里就不演示自己添加图片的方式了。
self.tabBarItem.badgeValue 这个在tabbar item上显示泡泡的数字。
对应的其他ViewController都添加上,tag写不同的数字,后面要用到的。现在运行就有效果了
 切换
切换
4、监听Item的点击事件
Tabbar有了,怎么监听你点了哪个item呢?
实现UITabBarDelegate。在apple的文档里查了一下,实现
- (void)tabBar:(UITabBar *)tabBar didSelectItem:(UITabBarItem *)item这个方法即可监听
- - (void)tabBar:(UITabBar *)tabBar didSelectItem:(UITabBarItem *)item
- {
- if(item.tag == 1){
- NSLog(@"TestOneController");
- }else if(item.tag == 2){
- NSLog(@"TestTwoController");
- }else {
- NSLog(@"TestThirdController");
- }
- }
通过tag判断,运行切换:打印log。
- 2012-06-28 20:56:19.144 View2TaBBarView[5614:f803] TestTwoController
- 2012-06-28 20:56:19.785 View2TaBBarView[5614:f803] TestThirdController
- 2012-06-28 20:56:20.363 View2TaBBarView[5614:f803] TestTwoController
- 2012-06-28 20:56:20.843 View2TaBBarView[5614:f803] TestOneController
5、返回上个页面
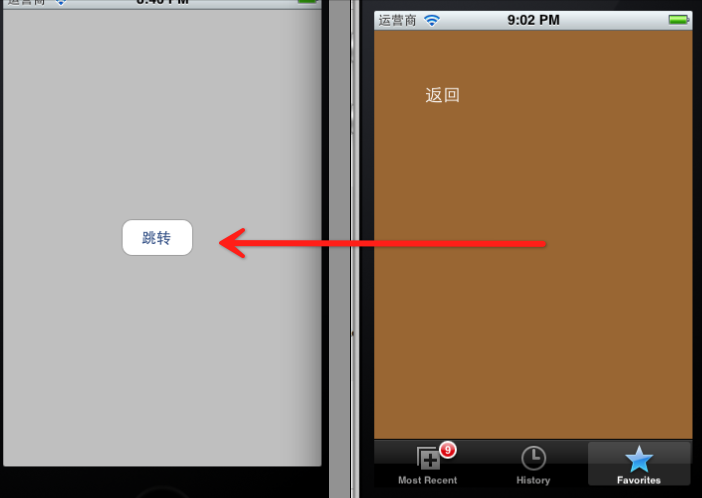
通过 [self.parentViewControllerdismissModalViewControllerAnimated:YES];
返回上个页面
在ThirdView添加一个button。添加Action事件。代码如下:
- -(void)backAction:(id)sender{
- [self.parentViewController dismissModalViewControllerAnimated:YES];
- }
- - (void)viewDidLoad
- {
- [super viewDidLoad];
- [self.view setBackgroundColor:[UIColor brownColor]];
- UIButton *button = [[UIButton alloc] initWithFrame:CGRectMake(40, 50, 60, 30)];
- [button setTitle:@"返回" forState:UIControlStateNormal];
- [button addTarget:self action:@selector(backAction:) forControlEvents:UIControlEventTouchUpInside];
- [self.view addSubview:button];
- // Do any additional setup after loading the view.
- }
运行,点返回button,返回了第一个页面了:

例子的代码:http://download.csdn.net/detail/totogo2010/4399715