VxWorks6.6中的RTP程序与WINDOWS的exe程序类似,我们可以使用操作系统的进程创建函数API,在程序中动态创建和调用。下面主要通过Download Kernel moudle来测试该API使用,整个调试过程与Tornado2.2基本相似,具体操作流程如下面描述。
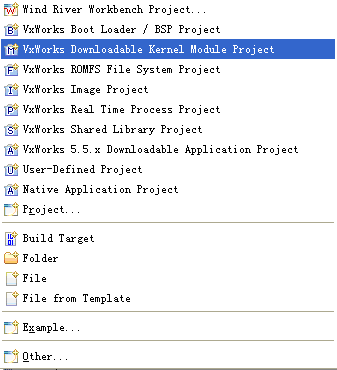
1、创建Downloadable Kernel module工程
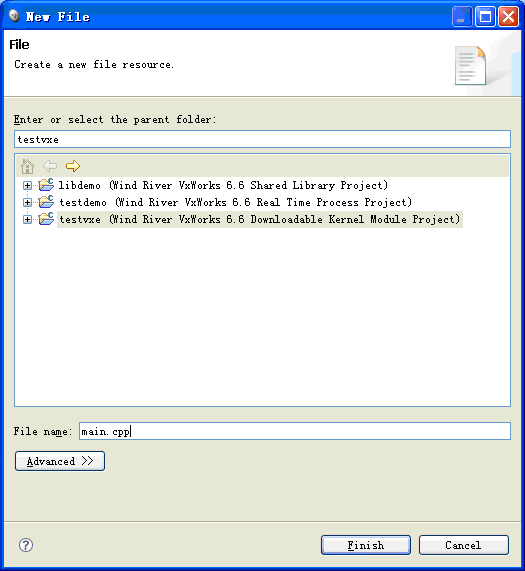
2、新建main.cpp文件
3、main.cpp代码如下
#include <vxWorks.h>
#include <stdio.h>
#include <rtpLibCommon.h>
#include <errnoLib.h>
#include <usrLib.h>

int main (void)
{
	int nRtp;
	// 注意这里的文件路径使用虚拟路径,否则将出现nRtp=-1不成功的状态!
	const char *argv[] = {"/C/openSUSE3000/fep/bin/testdemo.vxe", NULL};
	const char *envp[] = {"HEAP_INITIAL_SIZE=0x20000", "HEAP_MAX_SIZE=0x100000", NULL};
	nRtp = (int)rtpSpawn(argv[0], argv, envp, 100, 0x10000, 0, 0);
	if (nRtp == -1)
	{
		printErrno(errnoGet());
		printf ("The RTP task not spawned!\n");
	}
	else
	{
		printf ("This is a task spawned by testvxe program!\n");
	}
	return 0;
}
4、编译工程
Build Started in Project 'testvxe': 2011-09-23 17:05:40
Generation of makefiles started.
Generation of makefiles finished (Elapsed Time: 00:00).
Platform: Wind River VxWorks 6.6
Command: make --no-print-directory BUILD_SPEC=SIMNTdiab DEBUG_MODE=1 TRACE=1
Working Directory: C:/openSUSE3000/fep/code/test_sys/testvxe/SIMNTdiab
if [ ! -d "`dirname "testvxe_partialImage/Debug/Objects/testvxe/main.o"`" ]; then mkdir -p "`dirname "testvxe_partialImage/Debug/Objects/testvxe/main.o"`"; fi;echo "building testvxe_partialImage/Debug/Objects/testvxe/main.o"; dcc -g -tX86LH:vxworks66
-W:c:,-Xclib-optim-off -Xansi -Xlocal-data-area-static-only -Xforce-declarations -Xmake-dependency=0xd -IC:/WindRiver3.6/vxworks-6.6/target/h -IC:/WindRiver3.6/vxworks-6.6/target/h/wrn/coreip -DCPU=SIMNT -DTOOL_FAMILY=diab -DTOOL=diab -D_WRS_KERNEL
-o "testvxe_partialImage/Debug/Objects/testvxe/main.o" -c "C:/openSUSE3000/fep/code/test_sys/testvxe/main.cpp"
building testvxe_partialImage/Debug/Objects/testvxe/main.o
if [ ! -d "`dirname "testvxe_partialImage/Debug/testvxe_partialImage.o"`" ]; then mkdir -p "`dirname "testvxe_partialImage/Debug/testvxe_partialImage.o"`"; fi;echo "building testvxe_partialImage/Debug/testvxe_partialImage.o"; dld -tX86LH:vxworks66
-X -r5 -f 0x90,1,1 -o "testvxe_partialImage/Debug/testvxe_partialImage.o" testvxe_partialImage/Debug/Objects/testvxe/main.o && if [ "0" = "1" ]; then plink "testvxe_partialImage/Debug/testvxe_partialImage.o";fi
building testvxe_partialImage/Debug/testvxe_partialImage.o
if [ ! -d "`dirname "testvxe/Debug/testvxe.out"`" ]; then mkdir -p "`dirname "testvxe/Debug/testvxe.out"`"; fi;echo "building testvxe/Debug/testvxe.out";rm -f "testvxe/Debug/testvxe.out";ddump -Ng testvxe_partialImage/Debug/testvxe_partialImage.o
| tclsh C:/WindRiver3.6/vxworks-6.6/host/resource/hutils/tcl/munch.tcl -c pentium > testvxe/Debug/ctdt.c; dcc -g -tX86LH:vxworks66 -Xdollar-in-ident -Xforce-declarations -IC:/WindRiver3.6/vxworks-6.6/target/h -IC:/WindRiver3.6/vxworks-6.6/target/h/wrn/coreip
-DCPU=SIMNT -DTOOL_FAMILY=diab -DTOOL=diab -D_WRS_KERNEL -o testvxe/Debug/ctdt.o -c testvxe/Debug/ctdt.c; dld -tX86LH:vxworks66 -X -r5 -f 0x90,1,1 -r4 -o "testvxe/Debug/testvxe.out" testvxe/Debug/ctdt.o testvxe_partialImage/Debug/testvxe_partialImage.o
&& if [ "0" = "1" ]; then plink "testvxe/Debug/testvxe.out";fi
building testvxe/Debug/testvxe.out
make: built targets of C:/openSUSE3000/fep/code/test_sys/testvxe/SIMNTdiab
Build Finished in Project 'testvxe': 2011-09-23 17:05:44 (Elapsed Time: 00:04)
5、启动仿真器
6、下载二进制文件
从左边工程树目录中的testvxe->Binaries找到testvxe.out文件,鼠标右键时从弹出的菜单中选择下载“Download”即可。
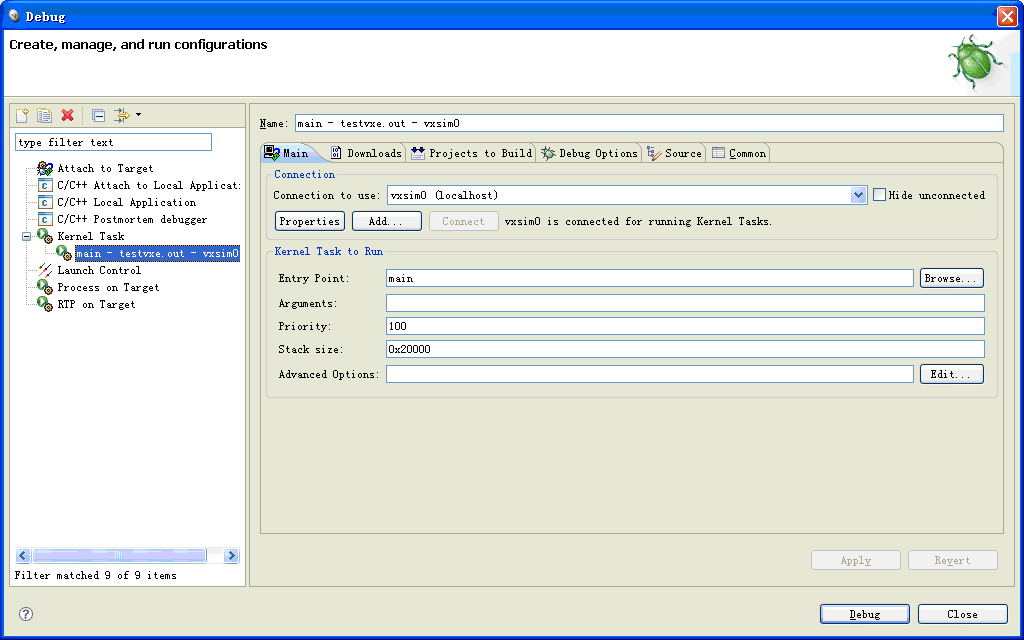
7、调试设置
在main.cpp中的11行(…const char *argv[]…)处设置断点,鼠标右键时从弹出的菜单中选择“Debug kernel task”,在Entry Point填入main函数。执行“Debug”按钮即进入调试状态。
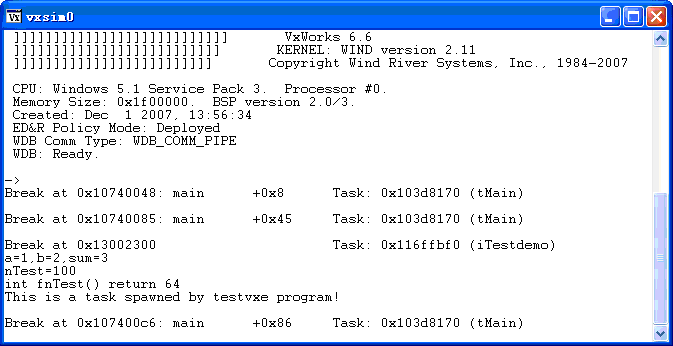
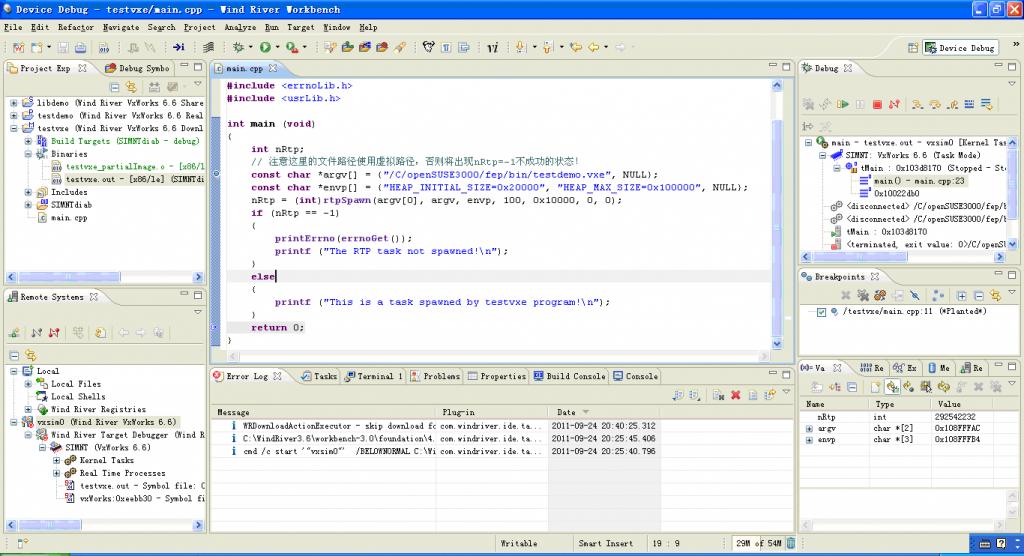
8、调试过程
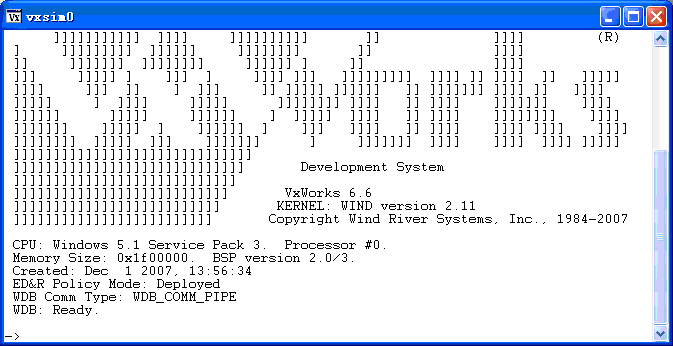
9、vxsim0执行效果