在进行正题之前,我们先来做一个简单的实验。下面是我编写的一个简单的测试网页,其中包含两个链接,第一个链接比较容易理解,点击后跳转到百度,第二个链接如果在我们的PC浏览器点击肯定会提示找不到网页,但是放在Android系统中呢?下面我们来进行测试。
<!DOCTYPE HTML PUBLIC "-//W3C//DTD HTML 4.0 Transitional//EN">

<html>
<head>
	<meta http-equiv="Content-Type" content="text/html; charset=UTF-8" />
	<title>Untitled</title>
</head>
<style>
body
{
	font-size: 20px;
	font-weight: bold;
	color: #0000FF;
}
</style>
<body>

<a href="http://www.baidu.com">百度一下</a><br><br>
<a href="android://MainActivity?id=coolszy">启动Android</a>

</body>
</html>
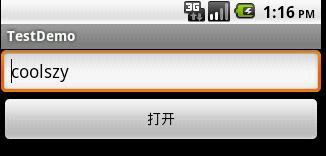
创建一个Android项目,其中MainActivity界面如下:
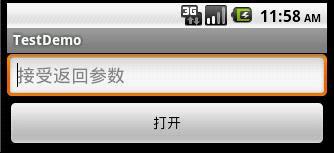
同时“打开”按钮进行如下操作:
btnOpen=(Button)findViewById(R.id.btnOpen);
btnOpen.setOnClickListener(new OnClickListener()
{
	@Override
	public void onClick(View v)
	{
		//测试网页地址
		Uri uri = Uri.parse("http://192.168.1.100:8080/index.htm");
		Intent intent = new Intent(Intent.ACTION_VIEW, uri);
		startActivity(intent);
	}
});
运行模拟器。点击“打开”按钮,点击“启动Android”链接并没有任何效果,在Logcat下输出如下错误信息:
android://MainActivity?id=coolszy The protocol is not supported.
提示我们的android协议不支持。熟悉<intent-filter>的朋友应该知道 <action>, <category>,,和<data> 这几个元素,通过配置这几个元素我们可以隐性的启动Activity,在这里我们可以通过配置这三个元素让我们的浏览器支持android协议,在MainActivity的<intent-filter> <action android:name="android.intent.action.MAIN" /> <category android:name="android.intent.category.LAUNCHER" /> </intent-filter>下再添加一个<intent-filter>:
<intent-filter> <action android:name="android.intent.action.VIEW" /> <category android:name="android.intent.category.DEFAULT" /> <category android:name="android.intent.category.BROWSABLE" /> <data android:scheme="android" android:host="MainActivity" /> </intent-filter>添加完毕后当我们再次运行模拟器。点击“打开”按钮,点击“启动Android”链接后我们发现我们的又回到了MainActivity,注意我们是通过浏览器启动Activity。下面我们需要处理的就是获取请求的路径,也就是 android://MainActivity?id=coolszy。这时我们可以复写Activity种的onNewIntent()方法,不熟悉的朋友可以百度了解该方法。我们都知道Activity之间信息的传递时通过Intent对象,因此通过该方法中的Intent对象,我们可以获得请求的路径,最终获得请求的参数信息:
@Override protected void onNewIntent(Intent intent) { Uri uri = intent.getData(); if (null!=uri) { String url = uri.toString(); Log.i(TAG, url); int index = url.lastIndexOf("="); if (index!=-1) { etParams.setText(url.substring(index+1)); } } super.onNewIntent(intent); }注:如果想让该方法执行,我们需修改AndroidManifest.xml文件中MainActivity的配置,添加android:lauchMode属性:
<activity android:name=".MainActivity" android:label="@string/app_name" android:launchMode="singleTask">此时当我们再次运行模拟器。点击“打开”按钮,点击“启动Android”链接后我们发现我们的回到了MainActivity上,同时也得到了参数。
我们在总结下这个实验:这个实验的主要目的是学习如何从浏览器种启动一个Activity,首先我们要给相关的Activity添加一个<intent-filter>,其次通过复写onNewIntent()方法得到返回信息,如果想要被onNewIntent()调用,我们还行给其Activity添加一个android:lauchMode属性。
下面我们回归到本次主题,在OAuth认证第一步种有个oauth_callback参数,作用是认证成功后浏览器会被重定向到这个url中,如果我们url设置为http://www.baidu.com,则会定位到http://www.baidu.com,同样,如果我们把url设置为android://MainActivity,则会定位到android://MainActivity上,如果Activity再加上<intent-filter>,这时MainActivity就可以自动获取到验证码,而不需要我们手动的输入。
首先,设置我们的oauth_callback参数:
params.add(new Parameter("oauth_callback", encode("android://MainActivity")));注:android://MainActivity之所以使用encode()是应为我在测试时发现当我们传递的url包含有“:”、“//”等符号会返回401错误,因此在这里进行encode()。
其次,修改AndroidManifest.xml文件中MainActivity配置:
<activity android:name=".MainActivity" android:label="@string/app_name" android:launchMode="singleTask"> <intent-filter> <action android:name="android.intent.action.MAIN" /> <category android:name="android.intent.category.LAUNCHER" /> </intent-filter> <intent-filter> <action android:name="android.intent.action.VIEW" /> <category android:name="android.intent.category.DEFAULT" /> <category android:name="android.intent.category.BROWSABLE" /> <data android:scheme="android" android:host="MainActivity" /> </intent-filter> </activity>同时给复写MainActivity的onNewIntent()方法,用于接收传递过来的参数信息:
@Override protected void onNewIntent(Intent intent) { super.onNewIntent(intent); Uri uri = intent.getData(); String url = uri.toString(); Log.i(TAG, url); int index = url.lastIndexOf("="); if (index!=-1) { txtVerifier.setText(url.substring(index+1)); } }至此我们的程序就能自动的获取验证码,而不需要用户手动的输入。
课程下载地址:http://u.115.com/file/dn43kklr