视点跟踪一个节点运动的原理是:把物体矩阵取反。。
#include <stdlib.h>
#include <stdio.h>
#include <gl/glut.h>
#include <math.h>
#include <time.h>

GLfloat angle = 0.0;
GLfloat theta = 0.0, vp = 6;//vp视点的位置

GLfloat cenx, ceny;

const int PI = 3.1415926;
const double N = 200.0;

int myWin;
const int MAX_MAP = 500;
int myMap[MAX_MAP][MAX_MAP];

inline double aToR(double x)
{
	return x/180.0 * 3.1415926;
}
void openLight()
{

	float light_position[4] = {30, 30, 30, 0};
	float light_ambient[4] = {1.0, 1.0, 1.0, 1.0};
	float light_diffuse[4] = { 1.0, 1.0, 1.0, 1.0};

	glLightfv(GL_LIGHT0,GL_POSITION,light_position);
	glLightfv(GL_LIGHT0,GL_AMBIENT,light_ambient);
	glLightfv(GL_LIGHT0, GL_DIFFUSE, light_diffuse);

	glEnable( GL_LIGHTING );
	glEnable( GL_LIGHT0 );
}

void cube()
{
	typedef float point3[3];
	typedef int edge[2];
	typedef int face[4];

	point3 vertices[8] = {
		{-1.0, -1.0, -1.0},
		{-1.0, -1.0, 1.0},
		{-1.0, 1.0, -1.0},
		{-1.0, 1.0, 1.0},
		{1.0, -1.0, -1.0},
		{1.0, -1.0, 1.0},
		{1.0, 1.0, -1.0},
		{1.0, 1.0, 1.0}
	};

	point3 normals[6] = {
		{-1.0, 0.0, 0.0},
		{0.0, 0.0, 1.0},
		{0.0, 1.0, 0.0},
		{0.0, 0.0, -1.0},
		{0.0, -1.0, 0.0},
		{1.0, 0.0, 0.0}
	};
	edge edges[24] = {
		{0, 1}, {1, 3}, {3, 2}, {2, 0},
		{0, 4}, {1, 5}, {3, 7}, {2, 6},
		{4, 5}, {5, 7}, {7, 6}, {6, 4},
		{1, 0}, {3, 1}, {2, 3}, {0, 2},
		{4, 0}, {5, 1}, {7, 3}, {6, 2},
		{5, 4}, {7, 5}, {6, 7}, {4, 6}
	};

		face cube[6] =
		{
			{0, 1, 2, 3}, {5, 9, 18, 13},
			{14, 6, 10, 19}, {7, 11, 16, 15},
			{4, 8, 17, 12}, {22, 21, 20, 23}
		};

		//GLdouble myClipPlane[] = {1.0, 1.0, 0.0, -1.0};
		//glClipPlane(GL_CLIP_PLANE0, myClipPlane);
		///glEnable(GL_DEPTH_TEST);
		//glEnable(GL_CLIP_PLANE0);
		glBegin(GL_QUADS);
			for(int face = 0; face < 6; face ++)
			{
				glNormal3fv(normals[face]);
				for(int edge = 0; edge < 4; edge ++)
				{
					glVertex3fv(vertices[edges[cube[face][edge]][0]]);
				}
			}
		glEnd();
		//glDisable(GL_CLIP_PLANE0);
}

void qumian()
{
	glLineWidth(10);
	glBegin(GL_LINES);


		glVertex3f(40, 0, 0);
		glVertex3f(0, 20, 0);

	glEnd();
}

void display(void)
{
	glClear( GL_COLOR_BUFFER_BIT | GL_DEPTH_BUFFER_BIT);
	glEnable(GL_DEPTH_TEST);
	glClearColor(0, 0, 0.5, 1);
	openLight();
	glMatrixMode(GL_MODELVIEW);
	glLoadIdentity();
	gluLookAt(0, 0, 0, 0.0, 0.0, -1.0, 0.0, 1.0, 0.0);

	glTranslatef(0, 0, -12);
	//glTranslatef(0, -5, 0);
	glRotatef(-angle, 0.0, 0.0, 1.0);

	//glScalef(10, 10, 10);
	glPushMatrix();
		glRotatef(angle, 0.0, 0.0, 1.0);
		//glTranslatef(0, 5, 0);
		cube();
	glPopMatrix();

	glPushMatrix();
		glTranslatef(2, 2, -9);
		cube();
	glPopMatrix();

	glPushMatrix();
		glTranslatef(2, 3, -2);
		cube();
	glPopMatrix();

	glPushMatrix();
		glTranslatef(-1, 3, 2);
		cube();
	glPopMatrix();

	glutSwapBuffers();

}

void reshape(int w, int h)
{
	int min = w < h?w:h;
	int cenx = w *  0.5;
	int ceny = h *  0.5;
	glViewport(cenx - min*0.5,  ceny - min*0.5,  (GLsizei)min, (GLsizei)min);
	glMatrixMode(GL_PROJECTION);
	glLoadIdentity();

	gluPerspective(60, 1, 0.1, 300.0);
	glutPostRedisplay();
}

void iterationStep(void)
{
	angle += 1.0;
	cenx = cos(angle / 180 * 3.14159) * vp + vp;
	ceny = sin(angle / 180 * 3.14159) * vp;
}

void animate(void)
{
	iterationStep();
	glutPostRedisplay();
}

int main ( int argc, char ** argv )
{
	glutInit(&argc, argv);
	glutInitDisplayMode(GLUT_DOUBLE | GLUT_RGB | GLUT_DEPTH);   //这里必须使用双缓冲区,双缓冲区通过在后一个缓冲区里绘画,并不停交换前后缓冲区(可见缓冲区),来产生平滑的动画,使用双缓冲区可以有效的预防闪烁。
	glutInitWindowSize(500, 500);
	glutInitWindowPosition(50, 50);
	myWin = glutCreateWindow("画球");

	glutDisplayFunc(display);
	glutReshapeFunc(reshape);
	glutIdleFunc(animate);
	glutMainLoop();
}
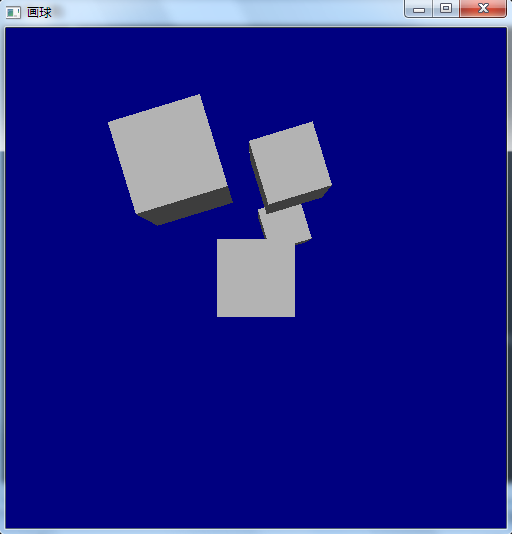
最终效果图如下所示: