from http://joshbeam.com/articles/dynamic_lightmaps_in_opengl/
This article explains how to implement dynamic lightmaps in OpenGL
with multitexturing. Features sample C code and is accompanied by a
demo written in C.
Lightmaps
First, a short
explanation of lightmaps, in case you're not already familiar with
them. A lightmap is a texture, with each of its pixels being a lighting
value that another texture's corresponding pixel is combined with. In
this article, we'll be multiplying each surface's texture by its
corresponding lightmap. Each pixel of the lightmap represents a number
between 0.0 and 1.0; so if a pixel on an RGB texture is (0.0, 0.0,
1.0), and it's multiplied by the corresponding pixel on its lightmap
that equals (0.5, 0.5, 0.5), the resulting, combined pixel would be
(0.0, 0.0, 0.5).
This type of texture combining can be
achieved with OpenGL's multitexturing functionality. The main reason
for using OpenGL's multitexturing functionality, rather than creating
the combined textures manually and sending them to the video card, is
that lightmaps can be much smaller than the texture they're lighting
and still give very good visual results. Since different surfaces often
use the same texture, but require different lightmaps, this can save a
lot of texture memory and bandwidth in a complex scene.
Now let's take a look at how to implement dynamically generated lightmaps.
Geometry information
Here's the structure we'll use for storing surfaces:
	struct surface {


		float vertices[4][3];


		float matrix[9];


		float s_dist, t_dist;


	};
For
each surface that will be lightmapped, there's a rotation matrix that
will convert a vector from the surface's texture space to world space,
since the light's position will be specified in world space.
In
the demo I've developed for this article, creating this matrix is easy
enough: For each quadrilateral surface, the first vertex is where the
top left corner of its texture is mapped to, the second vertex is where
the bottom left corner of its texture is mapped, the third vertex is
where the bottom right corner of its texture is mapped to, and the
fourth vertex is where the top right corner of its texture is mapped to.
The
X axis of the matrix should point in the world space direction of the S
texture coordinate (that is, from the top left corner to the top right
corner). So we take the fourth vertex (the top right corner), subtract
the first vertex (the top left corner), normalize the result, and we
have the X axis. Getting the Y axis is similar: it should point in the
world space direction of the T texture coordinate (top left to bottom
left corners), so we take the second vertex (the bottom left corner),
subtract the first vertex (the top left corner), and normalize the
result. We now have the Y axis. The Z axis is the surface's normal, and
is equal to the cross-product of the X axis and Y axis.
We also need to know the world space distances between the surface's top left corner and top right corner (s_dist
in the surface structure), and the surface's top left corner and bottom left corner (t_dist
in the surface structure). This is so we know how far apart,
horizontally and vertically, each pixel of the lightmap should be in
world space, which we need to know in order to get a correct lighting
value for each pixel. s_dist is equal to sqrt(dot_product(v4 - v1, v4 - v1))
, where v4 is the fourth vertex and v1 is the first vertex. t_dist is equal to sqrt(dot_product(v2 - v1, v2 - v1))
, where v2 is the second vertex and v1 is the first vertex.
All of the above is done in the new_surface
function in the demo.
Creating the Lightmaps
The generation of lightmaps is done in a function called generate_lightmap
. It takes a pointer to a surface as an argument, and returns a texture number that can be used in a glBindTexture call.
Right above the function, we have two global arrays of three floats: light_pos
, which contains the position of the light in the scene, and light_color
, which contains the color of the light in the scene. They're initialized like so:
	static float light_pos[3] = { 1.0f, 0.0f, 0.25f };


	static float light_color[3] = { 1.0f, 1.0f, 1.0f };
Now let's take a look at the generate_lightmap function:
	static unsigned int


	generate_lightmap(struct surface *surf)


	{


		static unsigned char data[LIGHTMAP_SIZE * LIGHTMAP_SIZE * 3];


		static unsigned int lightmap_tex_num = 0;


		unsigned int i, j;


		float pos[3];


		float step, s, t;
The data
array contains the RGB pixel data of the lightmap. Before going any
further, we'll get a texture number from OpenGL for the lightmaps
(we'll be using the same number for each lightmap, since they'll all be
generated dynamically):
		if(lightmap_tex_num == 0)


			glGenTextures(1, &lightmap_tex_num);
Now to create a lightmap with the information we have. First, we'll have a float variable named step
,
which is what s_dist and t_dist can be multiplied by to get the
distance between two pixels of the lightmap. A constant called LIGHTMAP_SIZE
(defined as 16 in the demo) will be used as the width and height of the lightmap, so step is initialized as follows:
step = 1.0f / LIGHTMAP_SIZE;
Our current texture space position will be stored in two floats named s
and t
;
they both start at 0.0 (the top left corner of the lightmap) and end at
1.0 (the bottom right corner of the lightmap). Now let's start looping
through each pixel of the lightmap...
		s = t = 0.0f;


		for(i = 0; i < LIGHTMAP_SIZE; i++) {


			for(j = 0; j < LIGHTMAP_SIZE; j++) {


				float d;


				float tmp;
i
is the current vertical (Y) position on the lightmap and j
is the current horizontal (X) position on the lightmap. d
will contain half the squared world space distance between the light and the current pixel of the lightmap, and tmp
will contain the lighting intensity (from 0.0 to 1.0) of the current
pixel. The first thing we do in the loop is get the world space
position of the current pixel. To do this, we first store the texture
space position of the current pixel in a 3D vector named pos
:
				pos[0] = surf->s_dist * s;


				pos[1] = surf->t_dist * t;


				pos[2] = 0.0f;
Now we multiply this by the surface's rotation matrix, which converts it from texture space to world space:
multiply_vector_by_matrix(surf->matrix, pos);
...
and then add the position of the surface's first (top left of lightmap)
vertex, so that the now-rotated vector is in the correct world space
position:
				pos[0] += surf->vertices[0][0];


				pos[1] += surf->vertices[0][1];


				pos[2] += surf->vertices[0][2];
To
get half the squared distance from this vector to the light's position,
we subtract the light's position from it and dot the resulting vector
by itself, then multiply that by 0.5:
				pos[0] -= light_pos[0];


				pos[1] -= light_pos[1];


				pos[2] -= light_pos[2];


				d = dot_product(pos, pos) * 0.5f;


				if(d < 1.0f)


					d = 1.0f;


				tmp = 1.0f / d;
tmp now contains a lighting value that we can use to set each RGB component of the current pixel of the lightmap:
				data[i * LIGHTMAP_SIZE * 3 + j * 3 + 0] = (unsigned char)(255.0f * tmp * light_color[0]);


				data[i * LIGHTMAP_SIZE * 3 + j * 3 + 1] = (unsigned char)(255.0f * tmp * light_color[1]);


				data[i * LIGHTMAP_SIZE * 3 + j * 3 + 2] = (unsigned char)(255.0f * tmp * light_color[2]);
Each
RGB color component of the pixel is set to 255 (the maximum value of an
unsigned byte) multiplied by the lighting value and the corresponding
RGB color component of the light (this allows for colored lighting).
After each pixel, we increase s by step; at the end of each line of the lightmap, we increase t by step and set s to 0.0 again.
				s += step;


			}


			t += step;


			s = 0.0f;


		}
Now we create an OpenGL texture out of the lightmap, and then we're done with lightmap creation:
		glBindTexture(GL_TEXTURE_2D, lightmap_tex_num);


		glPixelStorei(GL_UNPACK_ALIGNMENT, 1);


		glTexParameteri(GL_TEXTURE_2D, GL_TEXTURE_WRAP_S, GL_REPEAT);


		glTexParameteri(GL_TEXTURE_2D, GL_TEXTURE_WRAP_T, GL_REPEAT);


		glTexParameteri(GL_TEXTURE_2D, GL_TEXTURE_MAG_FILTER, GL_LINEAR);


		glTexParameteri(GL_TEXTURE_2D, GL_TEXTURE_MIN_FILTER, GL_LINEAR);


		glTexEnvi(GL_TEXTURE_ENV, GL_TEXTURE_ENV_MODE, GL_MODULATE);


		glTexImage2D(GL_TEXTURE_2D, 0, 3, LIGHTMAP_SIZE, LIGHTMAP_SIZE, 0, GL_RGB, GL_UNSIGNED_BYTE, data);


		return lightmap_tex_num;


	}
Multitexturing and Rendering
Now that we have the function for creating lightmaps, we can render the lightmapped surfaces (see the scene_render
function in the demo for all of the code). Since multitexturing will be
used, two texture units must be enabled (one for the surface's texture
and one for its lightmap). The same texture is used for each surface,
so we'll go ahead and bind it in the first texture unit now. The lighting
variable determines whether lightmaps should be enabled (if set to 1) or not (if set to 0).
	glActiveTextureARB(GL_TEXTURE0_ARB);


	glEnable(GL_TEXTURE_2D);


	glBindTexture(GL_TEXTURE_2D, surface_tex_num);


	glActiveTextureARB(GL_TEXTURE1_ARB);


	if(lighting)


		glEnable(GL_TEXTURE_2D);
Then the surfaces are rendered with this loop (the surfaces
array contains pointers to six surfaces):
	for(i = 0; i < 6; i++) {


		if(!surfaces[i])


			break;


		if(lighting)


			glBindTexture(GL_TEXTURE_2D, generate_lightmap(surfaces[i]));


		glBegin(GL_QUADS);


			glMultiTexCoord2fARB(GL_TEXTURE0_ARB, 0.0f, 0.0f);


			glMultiTexCoord2fARB(GL_TEXTURE1_ARB, 0.0f, 0.0f);


			glVertex3fv(surfaces[i]->vertices[0]);


			glMultiTexCoord2fARB(GL_TEXTURE0_ARB, 0.0f, 1.0f);


			glMultiTexCoord2fARB(GL_TEXTURE1_ARB, 0.0f, 1.0f);


			glVertex3fv(surfaces[i]->vertices[1]);


			glMultiTexCoord2fARB(GL_TEXTURE0_ARB, 1.0f, 1.0f);


			glMultiTexCoord2fARB(GL_TEXTURE1_ARB, 1.0f, 1.0f);


			glVertex3fv(surfaces[i]->vertices[2]);


			glMultiTexCoord2fARB(GL_TEXTURE0_ARB, 1.0f, 0.0f);


			glMultiTexCoord2fARB(GL_TEXTURE1_ARB, 1.0f, 0.0f);


			glVertex3fv(surfaces[i]->vertices[3]);


		glEnd();


	}
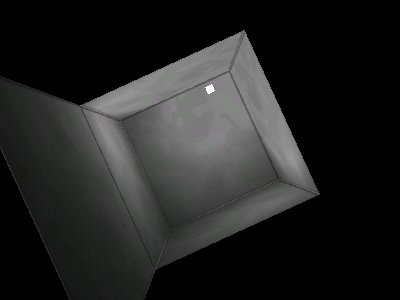
And we're done. Here's a screenshot of the demo:
附上自己简陋的中文翻译:
<!--
/* Font Definitions */
@font-face
{font-family:宋体;
panose-1:2 1 6 0 3 1 1 1 1 1;
mso-font-alt:SimSun;
mso-font-charset:134;
mso-generic-font-family:auto;
mso-font-pitch:variable;
mso-font-signature:3 680460288 22 0 262145 0;}
@font-face
{font-family:宋体;
panose-1:2 1 6 0 3 1 1 1 1 1;
mso-font-alt:SimSun;
mso-font-charset:134;
mso-generic-font-family:auto;
mso-font-pitch:variable;
mso-font-signature:3 680460288 22 0 262145 0;}
@font-face
{font-family:Calibri;
panose-1:2 15 5 2 2 2 4 3 2 4;
mso-font-charset:0;
mso-generic-font-family:swiss;
mso-font-pitch:variable;
mso-font-signature:-520092929 1073786111 9 0 415 0;}
@font-face
{font-family:"/@宋体";
panose-1:2 1 6 0 3 1 1 1 1 1;
mso-font-charset:134;
mso-generic-font-family:auto;
mso-font-pitch:variable;
mso-font-signature:3 680460288 22 0 262145 0;}
/* Style Definitions */
p.MsoNormal, li.MsoNormal, div.MsoNormal
{mso-style-unhide:no;
mso-style-qformat:yes;
mso-style-parent:"";
margin:0cm;
margin-bottom:.0001pt;
text-align:justify;
text-justify:inter-ideograph;
mso-pagination:none;
font-size:10.5pt;
mso-bidi-font-size:11.0pt;
font-family:"Calibri","sans-serif";
mso-ascii-font-family:Calibri;
mso-ascii-theme-font:minor-latin;
mso-fareast-font-family:宋体;
mso-fareast-theme-font:minor-fareast;
mso-hansi-font-family:Calibri;
mso-hansi-theme-font:minor-latin;
mso-bidi-font-family:"Times New Roman";
mso-bidi-theme-font:minor-bidi;
mso-font-kerning:1.0pt;}
pre
{mso-style-noshow:yes;
mso-style-priority:99;
mso-style-link:"HTML 预设格式 Char";
margin:0cm;
margin-bottom:.0001pt;
mso-pagination:widow-orphan;
font-size:12.0pt;
font-family:宋体;
mso-bidi-font-family:宋体;}
span.HTMLChar
{mso-style-name:"HTML 预设格式 Char";
mso-style-noshow:yes;
mso-style-priority:99;
mso-style-unhide:no;
mso-style-locked:yes;
mso-style-link:"HTML 预设格式";
mso-ansi-font-size:12.0pt;
mso-bidi-font-size:12.0pt;
font-family:宋体;
mso-ascii-font-family:宋体;
mso-fareast-font-family:宋体;
mso-hansi-font-family:宋体;
mso-bidi-font-family:宋体;
mso-font-kerning:0pt;}
.MsoChpDefault
{mso-style-type:export-only;
mso-default-props:yes;
font-family:"Calibri","sans-serif";
mso-bidi-font-family:"Times New Roman";
mso-bidi-theme-font:minor-bidi;}
/* Page Definitions */
@page
{mso-page-border-surround-header:no;
mso-page-border-surround-footer:no;}
@page WordSection1
{size:595.3pt 841.9pt;
margin:72.0pt 90.0pt 72.0pt 90.0pt;
mso-header-margin:42.55pt;
mso-footer-margin:49.6pt;
mso-paper-source:0;
layout-grid:15.6pt;}
div.WordSection1
{page:WordSection1;}
-->
OpenGL
中的动态光照映射图
Lightmaps
,姑且翻译成光照映射图,或者称为光照贴图。是
opengl
中常用的一种技术,但是一般都会需要支持
multitexturing
多纹理贴图这种扩展,一般的显卡现在都支持了,更有甚者,现在新版的底层的
3D
接口已经放弃了固定管线这种方式,所以这种技术是要自己通过
shader
来实现。
首先我们来简单的说一下概念,
lightmaps
如果你不懂,你可以把它当做是一个纹理,纹理的每一个像素值都是光照值,然后和另外一个纹理的对应的值相混合。在这篇文章中,我们将会把每一个表面都混合一个光照贴图。光照纹理的中的每一个值都是介于
0.0
和
1.0
之间;因此如果在
RGB
纹理上的一个纹理的像素值是(
0.0,0.0,1.0
)并且它的光照纹理上面的对应的值是(
0.5,0.5,0.5
),那么结果就是(
0.0,0.0,0.5
)。
这种混合可以通过
OpenGL
多纹理混合机制。这里为什么要使用
opengl
的纹理混合而不是自己去创建混合之后的纹理数据交给显卡?是因为我们的光照纹理的数据量比较小但是任然有很好的效果,不同的表面有时候会使用同样的纹理,但是不同的光照纹理。这样分开处理可以节省很多的纹理存储空间。
下面我们来具体说说我们的代码。
对于一个表面我们用如下的结构体来存放:
struct
surface {
float
vertices[4][3];
float
matrix[9];
float
s_dist, t_dist;
};
这里每一个表面有四个顶点,存放在
vertices
,然后由局部坐标到世界坐标,这里还有一个转换的矩阵3*3
的大小matrix
,这里需要我们这个转换矩阵,因为光源的位置将会在世界坐标中。
因为源码是专门针对这篇文章来实现的,所以比较简单,考虑的情况比较单一:对于每一个四边形表面,第一个顶点就是映射纹理的左上角,第二个就是纹理的左下角,第三个是右下角,第四个是右上角。
矩阵的x
轴方向指向纹理的s
方向(即左上到右上),所以我们的拿第四个顶点(右上)减去我们的第一个顶点(左上),对结果进行归一化处理,这样就有了x
轴。按照同样的方式去获得我们的Y
轴,取我们的Y
轴是我们的T
方向(左上到左下),那第二个减去第一个,将得到的结果进行归一化,Z
方向就是我们平面的法相向量。等于x y
的叉乘。
我们同样需要知道在世界坐标中,表面的左上角和右上角之间的距离(s_dist
在我们定义的结构体中),然后还有我们的左下角到左上角之间的距离(t_disk
),这样我们就知道水平和垂直方向的大小。,我们的光照贴图的每一个像素点都应该在世界坐标中,这样做是因为我们需要知道每一个点正确的光照值。s_disk
值为sqrt
(dot_product(v4-v1,v4-v1)
)v4
是第四个顶点,v1
是第一个顶点,同样的道理t_disk
的值为
sqrt(dot_product(v2 - v1,
v2 - v1))
的,v2
表示第二个顶点。所有的这些工作在我们的new_surface
方法中就准备好了。
创建光照纹理:
光照纹理的产生是通过
generate_lightmap
,这个方法会以一个suface
的指针作为参数,然后返回一个纹理的ID
,这个id
可以直接绑定(glBindTexture
)。
下面就是我们的光照纹理的产生函数,我们有两个全聚德数组,每个数组有三个float
:light_pos
,表示我们光照的位置;light_color
表示光照的颜色。
static float light_pos[3] = { 1.0f, 0.0f, 0.25f };
static float light_color[3] = { 1.0f, 1.0f, 1.0f };
下面让我们看看这个函数的实现:
static unsigned int
generate_lightmap(struct surface *surf)
{
static unsigned char data[LIGHTMAP_SIZE * LIGHTMAP_SIZE * 3];
static unsigned int lightmap_tex_num = 0;
unsigned int i, j;
float pos[3];
float step, s, t;
//data
数组包含了我们的光照纹理的RGB
数据,然后我们需要得到一个光照纹理的ID
,每一个光照纹理我们都会使用这个id
,因为他们会动态的产生)。
if(lightmap_tex_num == 0)
glGenTextures(1, &lightmap_tex_num);
现在我们为我们的光照纹理产生了一个id
。首先我们有一个局部变量佳作step
,这个变量表示我们的s_disk
和t_disk
上的距离,最开始为长度分之一,最后变成1
。
step = 1.0f / LIGHTMAP_SIZE;
然后就是开始里边我们的数据了,这里有两个变量s
和t
作为二维数组的历遍来使用。都是从0
到1.0
。里面光照纹理中的每一个像素:
s = t = 0.0f;
for(i = 0; i < LIGHTMAP_SIZE; i++) {
for(j = 0; j < LIGHTMAP_SIZE; j++) {
float d;
float tmp;
i
是垂直方向上的,j
是水平方向上。d
表示我们的像素点在世界坐标中离光源的位置。Tmp
表示我们的当前位置的光强,我们再循环中的第一件事情就是得到我们的这个像素的世界坐标。为了得到这个坐标,我们首先需要存储当前像素在纹理空间的位置到pos
中:
pos[0] = surf->s_dist * s;
pos[1] = surf->t_dist * t;
pos[2] = 0.0f;
然后和我们的表面的局部矩阵相乘,就得到我们该点在世界坐标中的偏移量:
multiply_vector_by_matrix(surf->matrix, pos);
然后将得到的pos
偏移量和我们的左上角顶点坐标处理:
pos[0] -= light_pos[0];
pos[1] -= light_pos[1];
pos[2] -= light_pos[2];
d = dot_product(pos, pos) * 0.5f;
if(d < 1.0f)
d = 1.0f;
tmp = 1.0f / d;
这里我们的衰减比较简单,直接和距离取倒数。
得到我们的光强之后,然后我们可以往我们的光照纹理中填充数值了:
data[i * LIGHTMAP_SIZE * 3 + j * 3 + 0] = (unsigned char)(255.0f * tmp * light_color[0]);
data[i * LIGHTMAP_SIZE * 3 + j * 3 + 1] = (unsigned char)(255.0f * tmp * light_color[1]);
data[i * LIGHTMAP_SIZE * 3 + j * 3 + 2] = (unsigned char)(255.0f * tmp * light_color[2]);
然后我们开始下一个点:
s += step;
}
t += step;
s = 0.0f;
}
这样的处理完了之后,这个suface
的光照贴图就做完了。让后我们需要将这个纹理绑定起来:
glBindTexture(GL_TEXTURE_2D, lightmap_tex_num);
glPixelStorei(GL_UNPACK_ALIGNMENT, 1);
glTexParameteri(GL_TEXTURE_2D, GL_TEXTURE_WRAP_S, GL_REPEAT);
glTexParameteri(GL_TEXTURE_2D, GL_TEXTURE_WRAP_T, GL_REPEAT);
glTexParameteri(GL_TEXTURE_2D, GL_TEXTURE_MAG_FILTER, GL_LINEAR);
glTexParameteri(GL_TEXTURE_2D, GL_TEXTURE_MIN_FILTER, GL_LINEAR);
glTexEnvi(GL_TEXTURE_ENV, GL_TEXTURE_ENV_MODE, GL_MODULATE);
glTexImage2D(GL_TEXTURE_2D, 0, 3, LIGHTMAP_SIZE, LIGHTMAP_SIZE, 0, GL_RGB, GL_UNSIGNED_BYTE, data);
return lightmap_tex_num;
}
这样我们的光照纹理就可以使用了。下面就看我们如何将光照纹理和我们的需要显示的RGB
纹理混合在一起:
多纹理贴图:
现在我们有了创建光照纹理的函数,我们就能够显示光照纹理了(查看源码的scene_render
函数)。因为我们的多纹理贴图将会被使用起来,所以至少两个纹理单元将会被激活(一个是纹理一个是光照纹理)。我们将每一个表面都使用相同的纹理,这样我们首先绑定我们的普通纹理在我们的第一个单元的纹理上面,这里变量lighting
将决定是否绑定我们的光照纹理:
glActiveTextureARB(GL_TEXTURE0_ARB);
glEnable(GL_TEXTURE_2D);
glBindTexture(GL_TEXTURE_2D, surface_tex_num);
glActiveTextureARB(GL_TEXTURE1_ARB);
if(lighting)
glEnable(GL_TEXTURE_2D);
然后我们开始显示我们的suface
,这里有六个面:
for(i = 0; i < 6; i++) {
if(!surfaces[i])
break;
if(lighting)
glBindTexture(GL_TEXTURE_2D, generate_lightmap(surfaces[i]));
glBegin(GL_QUADS);
glMultiTexCoord2fARB(GL_TEXTURE0_ARB, 0.0f, 0.0f);
glMultiTexCoord2fARB(GL_TEXTURE1_ARB, 0.0f, 0.0f);
glVertex3fv(surfaces[i]->vertices[0]);
glMultiTexCoord2fARB(GL_TEXTURE0_ARB, 0.0f, 1.0f);
glMultiTexCoord2fARB(GL_TEXTURE1_ARB, 0.0f, 1.0f);
glVertex3fv(surfaces[i]->vertices[1]);
glMultiTexCoord2fARB(GL_TEXTURE0_ARB, 1.0f, 1.0f);
glMultiTexCoord2fARB(GL_TEXTURE1_ARB, 1.0f, 1.0f);
glVertex3fv(surfaces[i]->vertices[2]);
glMultiTexCoord2fARB(GL_TEXTURE0_ARB, 1.0f, 0.0f);
glMultiTexCoord2fARB(GL_TEXTURE1_ARB, 1.0f, 0.0f);
glVertex3fv(surfaces[i]->vertices[3]);
glEnd();
}
然后就形成了我们的光照纹理。
注意光照纹理和普通的材质的区别。