http://blog.csdn.net/sharetop/article/details/6313654
其实要实现这个效果在Android中并非难事,因为官方的Launcher已经有现成的源代码放在那儿了,就是那个Workspace.java。大家可以去http://android.git.kernel.org/ 下载。
而我们要做的事情就是分析它并精简它(毕竟我们只是打算左右滑动罢了,并不需要能创建快捷方式文件夹之类的东西,更不需要在上面拖放图标)。
- public class Workspace extends ViewGroup
- implements DropTarget, DragSource, DragScroller {
- }
因此,不管是Drop还是Drag,统统不需要了:
- public class Workspace extends ViewGroup {
- }
同时,把那些个接口所要求实现的方法,以及那些与Drag/Drop相关的成员变量都去掉吧。
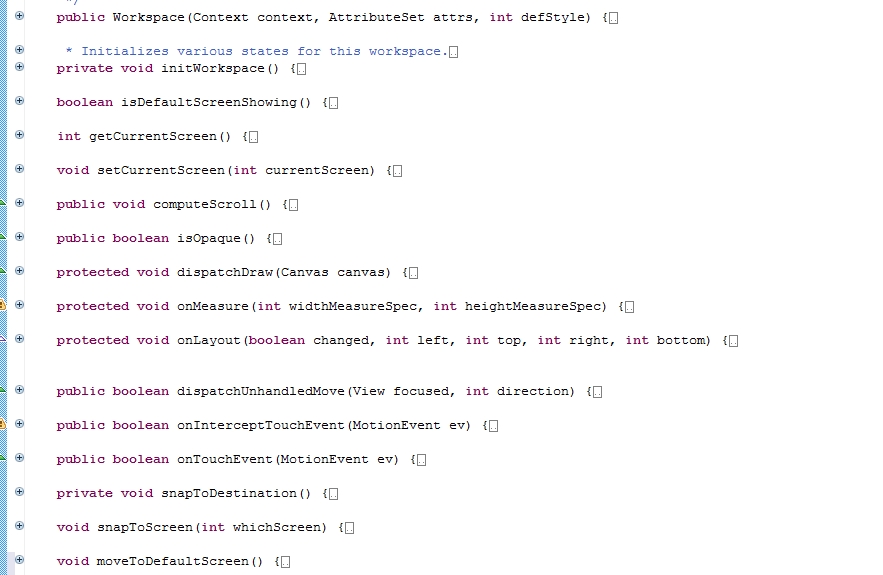
看看我精简后剩下什么成员变量:
- private static final int INVALID_SCREEN = -1;
- private int mDefaultScreen;
- private boolean mFirstLayout = true;
- private int mCurrentScreen;
- private int mNextScreen = INVALID_SCREEN;
- private Scroller mScroller;
- private float mLastMotionX;
- private float mLastMotionY;
- private final static int TOUCH_STATE_REST = 0;
- private final static int TOUCH_STATE_SCROLLING = 1;
- private int mTouchState = TOUCH_STATE_REST;
- private int mTouchSlop;
以上足矣。
然后在Eclipse中会有大量的错误,没关系,删吧。
addView 是用来在代码中添加新的子view的方法,不需要,我们只需要在layout xml中直接指定就好了。
getOpenFolder/getOpenFolders 文件夹相关的,当然不需要了。
addInCurrentScreen/addWidget 都没什么用处了,可以删掉。
与Cell相关的那些也可以删掉。
因为我们的代码不能直接访问mScrollX,所以需要换成getScrollX()。这一点是需要特别注意的。
看看我精简后都剩下些什么方法:
最后只要不报错,就OK了。
我们来分析一下几个关键的方法,其一是 onTouchEvent:
- @Override
- public boolean onTouchEvent(MotionEvent ev) {
- final int action = ev.getAction();
- final float x = ev.getX();
- switch (action) {
- case MotionEvent.ACTION_DOWN:
- if (!mScroller.isFinished()) {
- mScroller.abortAnimation();
- }
- // Remember where the motion event started
- mLastMotionX = x;
- break;
- case MotionEvent.ACTION_MOVE:
- //跟着手指拖动屏幕的处理。
- if (mTouchState == TOUCH_STATE_SCROLLING) {
- // Scroll to follow the motion event
- final int deltaX = (int) (mLastMotionX - x);
- mLastMotionX = x;
- if (deltaX < 0) {
- if (getScrollX() > 0) {
- scrollBy(Math.max(-1*getScrollX(), deltaX), 0);
- }
- } else if (deltaX > 0) {
- final int availableToScroll = getChildAt(getChildCount() - 1).getRight() -
- getScrollX() - getWidth();
- if (availableToScroll > 0) {
- scrollBy(Math.min(availableToScroll, deltaX), 0);
- }
- }
- }
- break;
- case MotionEvent.ACTION_UP:
- //抬起手指后,切换屏幕的处理
- if (mTouchState == TOUCH_STATE_SCROLLING) {
- snapToDestination();
- }
- mTouchState = TOUCH_STATE_REST;
- break;
- case MotionEvent.ACTION_CANCEL:
- mTouchState = TOUCH_STATE_REST;
- }
- return true;
- }
其二 snapToDestination和snapToScreen:
- private void snapToDestination() {
- //计算应该去哪个屏
- final int screenWidth = getWidth();
- final int whichScreen = (getScrollX() + (screenWidth / 2)) / screenWidth;
- //切换
- snapToScreen(whichScreen);
- }
- void snapToScreen(int whichScreen) {
- if (!mScroller.isFinished()) return;
- whichScreen = Math.max(0, Math.min(whichScreen, getChildCount() - 1));
- boolean changingScreens = whichScreen != mCurrentScreen;
- mNextScreen = whichScreen;
- View focusedChild = getFocusedChild();
- if (focusedChild != null && changingScreens && focusedChild == getChildAt(mCurrentScreen)) {
- focusedChild.clearFocus();
- }
- //让mScroller启动滚动
- final int cx = getScrollX();
- final int newX = whichScreen * getWidth();
- final int delta = newX - cx;
- mScroller.startScroll(cx, 0, delta, 0, Math.abs(delta) * 4);
- invalidate();
- }
其三 computeScroll,让Workspace滚动到合适的位置:
- @Override
- public void computeScroll() {
- if (mScroller.computeScrollOffset()) {
- scrollTo(mScroller.getCurrX(),mScroller.getCurrY());
- postInvalidate();
- } else if (mNextScreen != INVALID_SCREEN) {
- mCurrentScreen = Math.max(0, Math.min(mNextScreen, getChildCount() - 1));
- mNextScreen = INVALID_SCREEN;
- }
- }
基本上就是这些了,其它方法都是辅助的,很好理解。
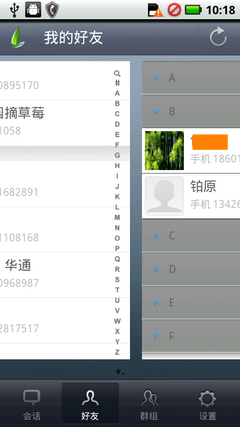
其实有一个问题,我们发现UCWeb主页下面有三个点指示当前所处的位置,这个指示器我的想法是可以放在Workspace外面来做,利用Workspace当前的mCurrentScreen值显示出当前正处于哪个屏。
给出我的layout xml描述:
- <cn.sharetop.demo.ui.Workspace
- android:id="@id/friends_switcher"
- android:layout_width="fill_parent"
- android:layout_height="640.0dip"
- android:layout_weight="1.0"
- xmessenger:defaultScreen="0"
- >
- <include layout="@layout/screen1" />
- <include layout="@layout/screen2" />
- </cn.sharetop.demo.ui.Workspace>
- <TextView
- android:layout_width="fill_parent"
- android:layout_height="wrap_content"
- android:textColor="#000000"
- android:background="@android:color/transparent"
- android:gravity="center"
- android:text="[1]2" />
就这样了。这个分页指示器就留给你自己去发挥了。