A good content management system should provide a rich and flexible infrastructure for creating templates (page layouts). These page layouts are the basis for the pages published on WCM-enabled SharePoint sites. Office SharePoint Server 2007 makes creating page layouts an easy process by using the storage enhancements discussed at the start of the article.
A number of page layouts are readily available for content authors to use. But let me guide you through the steps of creating your own custom page layout—one for a page that contains a job posting.
The first step is the creation of a content type. You can create a content type at the level of the site collection if you open the Site Settings administration page from your top-level site. From here, you can navigate to the Site Content Type Gallery (Figure 10). You can create the content type in the Site Content Type Gallery of one of your subsites and scope it to that site and all of the subsites.
Figure 10. Site content type gallery, which contains all content types that are available in a site collection

Notice that the gallery is already populated with content types. You can add to this list by clicking Create in the toolbar.
The first section in the New Site Content Type page specifies the name, description, and parent of the new content type. Each content type is based on a content type. This lineage creates a hierarchy that connects to the top-level System content type. You can follow this hierarchy if you go to a page that details a content type. The top section contains a link to the parent content type (Figure 11). Clicking the link displays the page defining the parent content type. You can repeat the process all the way to the top-level content type.
Figure 11. Location of the link to the parent content type

If you select Page Layout Content Types on the New Site Content Type page, you can see in the Parent Content Type list all of the content types that are the bases for the page layouts included with Office SharePoint Server 2007. If you select Publishing Content Types, you can see the base content types such as Page and Page Layout. For this example, select the first one, Page (Figure 12).
Figure 12. Creating your own Job Postings content type
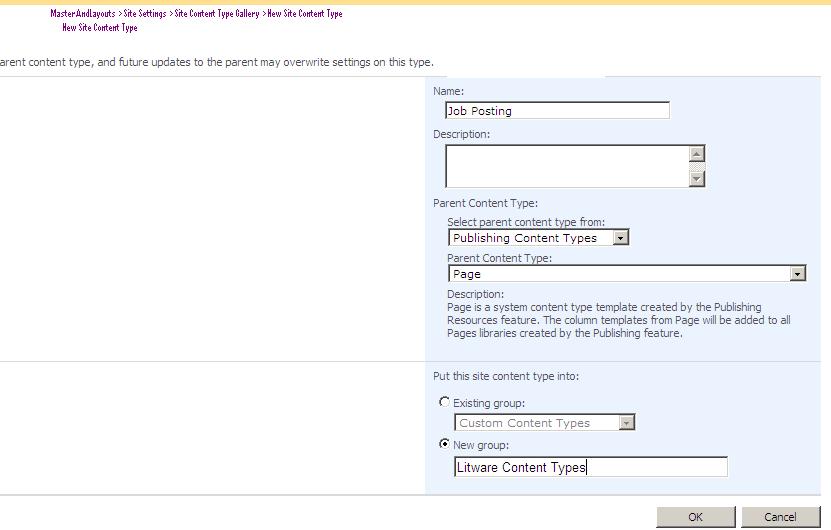
You can also create your own custom group so that you can differentiate your work from the content types delivered with Office SharePoint Server 2007.
In the next page you define the details for your content type. The custom fields or columns you define here are important because later they become field controls that you can add to a page layout by using SharePoint Designer.
For the job posting example, let's add three columns that capture the information we want to make available on the page.
To add columns to the content type
1. The first column, the job title field, is already part of the site columns at the level of the site collection. Add the column by clicking Add from existing site columns.
2. Because the two other fields are not available as site columns, you must create them. Click Add from new site column.
3. For the second column, type the name Job Description and select the type Full HTML content with formatting and constraints for publishing.
4. For the third column, type the name Job Prerequisites and select the type Choice.
For choice values, add, for example, SharePoint Development, ASP.NET Development, C#, Visual Basic 2005, HTML, and QuickBasic. You might want to let the content author select multiple options by selecting the Checkboxes (allow multiple selections) display option.
Now that you have defined what type of content you want to publish, it is time to create the page layout or template to be used by the content authors to create the job posting pages. Page layouts are created from the master page gallery. You can access the master page gallery via the Site Settings page at the level of your top-level site. Click the Master Pages and Page Layouts link in the Galleries group.
Remember that the content type you created is your definition of the content available with this type of page. Therefore, ensure that you select the correct content type at the top of the New Page Layout page. On this page you also need to enter the name of the file, the title of the page, and (optionally) a description.
You can also create page layouts in SharePoint Designer.
To create a page layout in SharePoint Designer
1. In SharePoint Designer, open the site.
2. Expand the _catalogs node, and right-click the masterpage (Master Page Gallery) node.
3. Point to New and click SharePoint Content.
4. In the dialog box, click SharePoint Publishing and select Page Layout.
5. Use the drop-down lists to select your content type group and then the content type that you created in the previous steps.
6. Fill in the name and title of your new page layout.
In both cases—creating the page layout in the browser or in SharePoint Designer—the controls that enable content authors to communicate with the content are not yet in place. Your next task is to use SharePoint Designer to place the field controls on the page layout.
From the master page gallery, edit the Job Posting.aspx file. Notice how the Toolbox displays the list of content fields that you can now drag and drop in the PlaceHolderMain section (Figure 13). As a designer, you determine the appearance of the page. You can also tweak the controls by using the Properties box.
Figure 13. Field controls based on the fields from the associated content type

To make the page layout available, you must save, check in, and get the file approved. You can perform these actions from within the master page gallery.
Now the content authors can use the custom page layout. Depending on the scope and the permissions, they can use the page layout in all of the sites or are restricted to only one. Let's assume the role of the content author and use the newly designed page layout.
To create a page based on the Job Posting page layout
1. In the browser, navigate to a site in your site collection or the site to which you have scoped the page layout.
2. Click Site Actions and click Create Page.
3. Provide a name and an optional description, and then select the Job Posting page layout. Click Create.
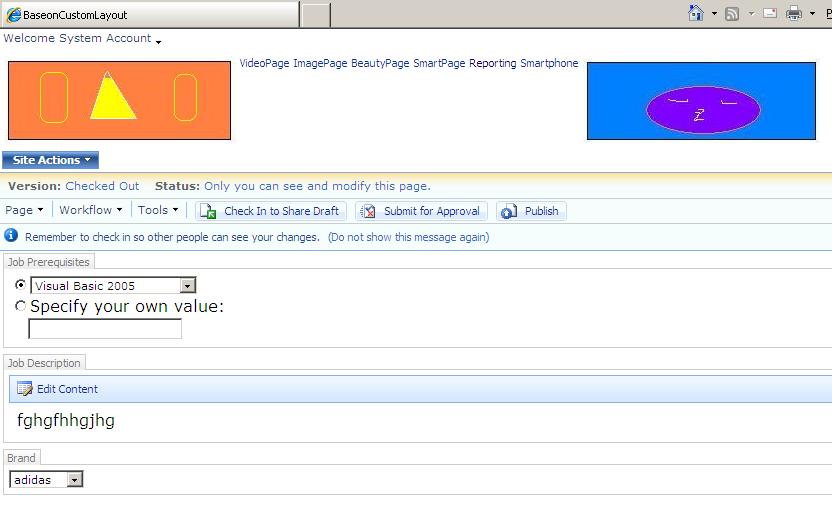
The new page displays the field controls that you placed on the page layout (Figure 14).
Figure 14. Page with the field controls you placed by using SharePoint Designer
4. To make the page available, check in the page and submit it for approval.
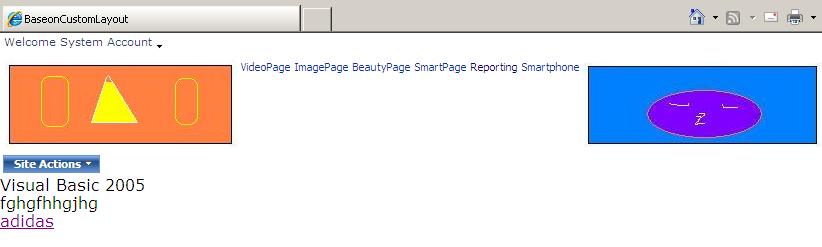
A user who is a member of the Approvers group can then approve the page and change it to a published page (Figure 15) accessible by everyone visiting the site. (This assumes workflow is enabled. If not, anyone with approval rights can approve the job.)
Figure15. Approved page as displayed to visitors of the site