下面做一些说明,具体还是需要见官方:http://developer.android.com/guide/developing/tools/monkeyrunner_concepts.html
一、根据官方的说明,大致的google翻译给出的测试原来意思,基本上google翻译的还是很不错能看懂:
monkeyrunner工具提供一个API编写程序,控制Android代码以外的Android设备或模拟器。与monkeyrunner,你可以写一个Python程序,安装一个Android应用程序或测试包,运行它,它发送击键,它的用户界面截图,并存储在工作站上的截图。 monkeyrunner工具主要旨在测试功能/框架水平和运行单元测试套件的应用程序和设备,但你可以自由用于其他目的。
Monkey工具直接运行在设备或模拟器的adb shell中,生成用户或系统的伪随机事件流。
monkeyrunner工具提供的Android测试独特的功能:
多种设备控制:monkeyrunner API,可以申请一个或多个测试套件,跨多个设备或模拟器。您可以物理连接的所有设备或一次启动所有的模拟器(或两者),依次连接到每一个编程,然后运行一个或多个测试。您还可以启动模拟器配置编程,运行一个或多个测试,然后关闭模拟器。
功能测试:monkeyrunner可以运行自动开始到结束的一个Android应用程序的测试。您提供按键或触摸事件的输入值,并查看结果作为截图。
回归测试 - monkeyrunner可以测试应用稳定运行的应用程序,并比较其输出截图一组被称为是正确的截图。
可扩展自动化 - ,由于monkeyrunner是一个API工具包,你可以开发一个基于Python的模块和控制Android设备的方案,整个系统。除了使用monkeyrunner
API本身,你可以使用标准的Python操作系统和子模块调用Android的工具,如Android调试桥。
您还可以添加自己的类的monkeyrunner API。这是在一节中的扩展插件monkeyrunner详细描述。
monkeyrunner工具使用,使用Java编程语言Python实现的Jython。 Jython的允许的monkeyrunner
API轻松地互动与Android框架。使用Jython,你可以使用Python语法来访问的常量,类和API的方法。
二、官方说明:
The monkeyrunner tool provides an API for writing programs that control an Android device or emulator from outside of Android code. With monkeyrunner, you can write a Python program that installs an Android application or test package, runs it, sends keystrokes
to it, takes screenshots of its user interface, and stores screenshots on the workstation. The monkeyrunner tool is primarily designed to test applications and devices at the functional/framework level and for running unit test suites, but you are free to
use it for other purposes.
The monkeyrunner tool is not related to the UI/Application Exerciser Monkey, also known as the monkey tool.
The monkey tool runs in an adb shell
directly on the device or emulator and generates pseudo-random streams of user and system events. In comparison, the monkeyrunner tool controls devices and emulators from a workstation by sending specific commands and events from an API.
The monkeyrunner tool provides these unique features for Android testing:
-
Multiple device control: The monkeyrunner API can apply one or more test suites across multiple devices or emulators. You can physically attach all the devices or start up all the emulators (or both) at once, connect to each one in turn programmatically, and
then run one or more tests. You can also start up an emulator configuration programmatically, run one or more tests, and then shut down the emulator. - Functional testing: monkeyrunner can run an automated start-to-finish test of an Android application. You provide input values with keystrokes or touch events, and view the results as screenshots.
- Regression testing - monkeyrunner can test application stability by running an application and comparing its output screenshots to a set of screenshots that are known to be correct.
-
Extensible automation - Since monkeyrunner is an API toolkit, you can develop an entire system of Python-based modules and programs for controlling Android devices. Besides using the monkeyrunner API itself, you can use the standard Python
osandsubprocessmodules
to call Android tools such as Android Debug Bridge.You can also add your own classes to the monkeyrunner API. This is described in more detail in the section Extending monkeyrunner with
plugins.
The monkeyrunner tool uses Jython, a implementation of Python that uses the Java programming language. Jython allows the monkeyrunner API to interact easily with the Android framework. With Jython
you can use Python syntax to access the constants, classes, and methods of the API.
三、大致的monkeyrunner需要全部掌握的知识点:
四、具体的有关三个api的说明:
中文说明: monkeyrunner API 包含三个模块在包 com.android.monkeyrunner中
-
MonkeyRunner:这个类提供了一个用于连接到一个设备或模拟器的方法,它还提供了用于创建用户界面显示。 -
MonkeyDevice:。 -
MonkeyImage:
在Python程序中,您可以访问每类作为一个Python模块。monkeyrunner工具不自动导入这些模块。导入一个模块,使用Python语句:
进口从com.android.monkeyrunner的<module>
<module>的地方是你要导入类的名称。你可以在同一语句中导入模块名称用逗号分隔多个模块。
The monkeyrunner API is contained in three modules in the package com.android.monkeyrunner:
-
MonkeyRunner: A class of utility methods for monkeyrunner programs.
This class provides a method for connecting monkeyrunner to a device or emulator. It also provides methods for creating UIs for a monkeyrunner program and for displaying the built-in help. -
MonkeyDevice: Represents a device or emulator. This class provides
methods for installing and uninstalling packages, starting an Activity, and sending keyboard or touch events to an application. You also use this class to run test packages. -
MonkeyImage: Represents a screen capture image. This class provides
methods for capturing screens, converting bitmap images to various formats, comparing two MonkeyImage objects, and writing an image to a file.
In a Python program, you access each class as a Python module. The monkeyrunner tool does not import these modules automatically. To import a module, use the Python from statement:
from com.android.monkeyrunner import <module>
where <module> is the class name you want to import. You can import more than one module in the same from statement
by separating the module names with commas.
五、定制自己的运行脚本
下面为官方的教程,教你怎么写这个脚本,后面附上了一个脚本例子
  # Imports the monkeyrunner modules used by this program
  from com.android.monkeyrunner import MonkeyRunner, MonkeyDevice
  # Connects to the current device, returning a MonkeyDevice object  和当前的模拟器或设备链接成功,返回一个链接驱动的对象
  device = MonkeyRunner.waitForConnection()
  # Installs the Android package. Notice that this method returns a boolean, so you can test 安装apk文件,注意这个方法返回true表示你可以进行测试了
  # to see if the installation worked.
  device.installPackage('myproject/bin/MyApplication.apk')
  # sets a variable with the package's internal name  设置你要测试的应用的包名
  package = 'com.example.android.myapplication'
  # sets a variable with the name of an Activity in the package  设置一个带包名的activity
  activity = 'com.example.android.myapplication.MainActivity'
  # sets the name of the component to start 设置启动的界面的activity
  runComponent = package + '/' + activity
  # Runs the component
  device.startActivity(component=runComponent)  启动你之前设置的界面
  # Presses the Menu button   这里为你要执行的动作
  device.press('KEYCODE_MENU', MonkeyDevice.DOWN_AND_UP)  有关KEYCODE_EVEN可以参考http://developer.android.com/reference/android/view/KeyEvent.html
  # Takes a screenshot
  result = device.takeSnapshot()
  # Writes the screenshot to a file
  result.writeToFile('myproject/shot1.png','png')
下面是个脚本实例:
  # Imports the monkeyrunner modules used by this program
  from com.android.monkeyrunner import MonkeyRunner, MonkeyDevice, MonkeyImage
  # Connects to the current device, returning a MonkeyDevice object
  device = MonkeyRunner.waitForConnection()
  # Installs the Android package. Notice that this method returns a boolean, so you can test
  # to see if the installation worked.
  device.installPackage('./ApiDemos.apk')
  # Runs the component
  device.startActivity(component='com.example.android.apis/.ApiDemos')
  # Presses the Down button
  device.press('KEYCODE_DPAD_DOWN','DOWN_AND_UP')
  device.press('KEYCODE_MENU','DOWN_AND_UP')
  # Takes a screenshot
  result = device.takeSnapshot()
  # Writes the screenshot to a file
  result.writeToFile('./shot1.png','png')
六、上面的脚本放入一个自定义名字的文本文件中,如:monkeyrunnertest.py文件中,从这个后缀名可以看出这个是python语音的,所以你开发monkeyrunner最好要学习下这个语音,下面是别人也是初学者学习python写的脚本,让大家看下复杂度:
  #导入我们需要用到的包和类并且起别名
  import sys,time,datetime
  from com.android.monkeyrunner import MonkeyRunner as mr
  from com.android.monkeyrunner import MonkeyDevice as md
  from com.android.monkeyrunner import MonkeyImage as mi
  deviceslist = []
  devices = []
  snapshot = []
  templist = []
  f = open("devices.txt")
  while True:
	line = f.readline()
	if line:
		templist.append(line.strip())
	else:
		break;
  f.close()
  templist.pop()
  for i in range(len(templist)):
	deviceslist.append(templist[i].split('\t'))
  fc = open("componentName.txt")
  complist = []
  while True:
	comp = fc.readline()
	if comp:
		complist.append(comp.strip())
	else:
		break;
  fc.close()
  fp = open("apk.txt")
  apklist = []
  while True:
	apk = fp.readline()
	if apk:
		apklist.append(apk.strip())
	else:
		break;
  print 'apk list :'
  print apklist
  print 'start componentName list :'
  print complist
  print 'devices list:'
  print deviceslist
  for i in range(1,len(deviceslist)):
	print 'current devices:'
	print deviceslist[i]
	devices.append(mr.waitForConnection(1.0,deviceslist[i][0]))
	#安装apk文件
	for j in range(len(apklist)):
		devices[i-1].installPackage('apk/'+apklist[j])
	#启动activity
	for k in range(len(complist)):
		print 'current start activity:'
		print complist[k]
		devices[i-1].startActivity(component=complist[k])
		#设置延时秒数
		mr.sleep(5.0)
		#----------------
		#这里可进行一定的UI操作
		#----------------
		#mr.sleep(3.0)
		#进行截图
		snapshot.append(devices[i-1].takeSnapshot())
		print 'end snapshot'
		#创建时间字符串
		t = time.strftime("%Y-%m-%d-%X",time.localtime())
		t = t.replace(":","-")
		#保存截图
		package = complist[k].replace('/.','.')
		snapshot[0].writeToFile('takeSnapshot/'+deviceslist[i][0]+'-'+t+'-'+package+'.png','png');
		snapshot.pop()
七、上面这个脚本写好了放在哪呢?继续看官方说明:
You can either run monkeyrunner programs from a file, or enter monkeyrunner statements in an interactive session. You do both by invoking the monkeyrunner command which is found
in the tools/ subdirectory of your SDK directory. If you provide a filename as an argument, the monkeyrunner command
runs the file's contents as a Python program; otherwise, it starts an interactive session.
The syntax of the monkeyrunner command is
monkeyrunner -plugin <plugin_jar> <program_filename> <program_options>
Table 1 explains the flags and arguments.
Table 1. monkeyrunner flags and arguments.
| Argument | Description |
|---|---|
-plugin <plugin_jar> |
(Optional) Specifies a .jar file containing a plugin for monkeyrunner. To learn more about monkeyrunner plugins, see Extendingmonkeyrunner with plugins. To specify more than one file, include the argument multiple times. |
<program_filename> |
If you provide this argument, the monkeyrunner command runs the contents of the file as a Python program. If the argument is not provided, the command starts an interactive session. |
<program_options> |
(Optional) Flags and arguments for the program in <program_file>. |
从上面我们可以读出有两种方式,我选择一种简单的方式:You do both by invoking the monkeyrunner command which
is found in the tools/ subdirectory of your SDK directory 即:把脚本monkeyrunnertest.py放入Android_Root\tools目录下
八、运行执行脚本,官方说明:
You can generate an API reference for monkeyrunner by running:
monkeyrunner <format> help.py <outfile>
The arguments are:
-
<format> is either text for plain text output or html for
HTML output. 是文本或HTML输出纯文本的HTML输出 - <outfile> is a path-qualified name for the output file. 是一个输出文件的路径限定名称
我们还是简单点吧不要输出到具体哪个文件了,执行命令:monkeyrunner
monkeyrunnertest.py 这样你就会看到相应的执行效果了
九、如果你想进行一些拓展性的开发,则官方也相应的给出了说明:
You can extend the monkeyrunner API with classes you write in the Java programming language and build into one or more .jar files.
You can use this feature to extend the monkeyrunner API with your own classes or to extend the existing classes. You can also use this feature to initialize the monkeyrunner environment.
To provide a plugin to monkeyrunner, invoke the monkeyrunner command with the -plugin <plugin_jar> argument
described in table 1.
In your plugin code, you can import and extend the the main monkeyrunner classes MonkeyDevice, MonkeyImage,
and MonkeyRunner in com.android.monkeyrunner (see The
monkeyrunner API).
Note that plugins do not give you access to the Android SDK. You can't import packages such as com.android.app. This is because monkeyrunner interacts with the device or emulator
below the level of the framework APIs.
The plugin startup class
The .jar file for a plugin can specify a class that is instantiated before script processing starts. To specify this class, add the key MonkeyRunnerStartupRunner to
the .jar file's manifest. The value should be the name of the class to run at startup. The following snippet shows how you would do this within an ant build
script:
<jar jarfile="myplugin" basedir="${build.dir}">
<manifest>
<attribute name="MonkeyRunnerStartupRunner" value="com.myapp.myplugin"/>
</manifest>
</jar>
To get access to monkeyrunner's runtime environment, the startup class can implement com.google.common.base.Predicate<PythonInterpreter>. For example, this class sets up some variables
in the default namespace:
package com.android.example;

import com.google.common.base.Predicate;
import org.python.util.PythonInterpreter;

public class Main implements Predicate<PythonInterpreter> {
    @Override
    public boolean apply(PythonInterpreter anInterpreter) {

        /*
        * Examples of creating and initializing variables in the monkeyrunner environment's
        * namespace. During execution, the monkeyrunner program can refer to the variables "newtest"
        * and "use_emulator"
        *
        */
        anInterpreter.set("newtest", "enabled");
        anInterpreter.set("use_emulator", 1);

        return true;
    }
}
附上一个可以运行的例子:
1、 脚本内容
# Imports the monkeyrunner modules used by this program

  from com.android.monkeyrunner import MonkeyRunner, MonkeyDevice, MonkeyImage

 # Connects to the current device, returning a MonkeyDevice object

 device = MonkeyRunner.waitForConnection()

 # Takes a screenshot

 result = device.takeSnapshot()

 # Writes the screenshot to a file

 result.writeToFile('./shotbegin.png','png')

 # Presses the Down button

 device.press('KEYCODE_DPAD_DOWN','DOWN_AND_UP')

 device.press('KEYCODE_DPAD_DOWN','DOWN_AND_UP')

 device.press('KEYCODE_DPAD_DOWN','DOWN_AND_UP')

 device.press('KEYCODE_DPAD_DOWN','DOWN_AND_UP')

 device.press('KEYCODE_DPAD_DOWN','DOWN_AND_UP')

 # Takes a screenshot

 result = device.takeSnapshot()

 # Writes the screenshot to a file

 result.writeToFile('./shotend.png','png')
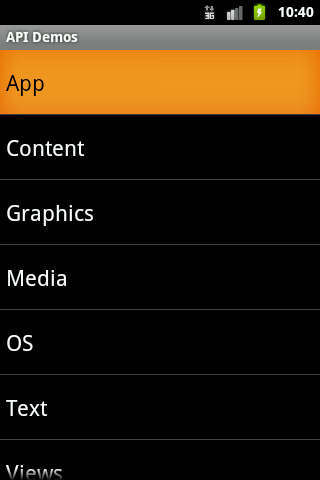
2、 点击Apidemos应用图标,进入Apidemos应用,光标停留在第一条item即app上
3、 执行命令:monkeyrunner monkeyrunnertest.py
4、 效果:我们可以看见光标不断向下移动
运行前:shotbegin.png
运行后(做了五次下移操作):shotend.png
