关于导航控制器+展示按钮,程序功能很简单写起来其实也很简单


这个程序一共分为三层,前两层为TableView视图,没有其他控件,所以创建时直接继承UITableViewController,那么我们就会的到一个TableView视图,今天这个程序在第一个视图中只提供一个功能,但是我们可以为它添加更多的功能,如果有很多功能,那么我们就可以为第二级视图创建一个统一的试图控制器.
所以,构建一个Windows-Base Application的程序,并穿件第一级视图控制器MyBaseViewController(.h,.m),并为导航控制器做必要的工作,{如果这里不清楚可以参考{<<iOS
Dev 初识 导航控制器>(http://blog.csdn.net/wintelsui/article/details/7447077)}
建立一个用于统一管理的继承与UITableViewController视图控制器MySecondViewController(.h,.m),
建立第二级别视图控制器FirstShowMoreViewController(.h,.m)并继承与MySecondViewController,
建立第三级视图控制器FirstShowMoreDetailViewController(.h,.m,.xib),
因为在第一级别视图中每一行都有一个图标,所以在MySecondViewController中要为每一个二级视图,添加一个图片供一级视图调用
MySecondViewController.h:
#import <UIKit/UIKit.h>

@interface MySecondViewController : UITableViewController
{
    UIImage *ImageForRow;
}
@property (strong ,nonatomic) UIImage *ImageForRow;

@end
MySecondViewController.m:
#import "MySecondViewController.h"
#import "FirstShowMoreViewController.h"

@implementation MySecondViewController
@synthesize ImageForRow;
- (id)initWithStyle:(UITableViewStyle)style
{
    self = [super initWithStyle:style];
    if (self) {
        // Custom initialization
    }
    return self;
}
@end
在这里我们删除了创建的时候自动生成的一些代码,因为这个只是供管理第二级别视图,但是地二级视图的显示由他们自己决定
第二级视图
MySecondViewController.h
#import "MySecondViewController.h"
#import "FirstShowMoreDetailViewController.h"
@interface FirstShowMoreViewController :MySecondViewController
{
    NSArray *arraylist;
    FirstShowMoreDetailViewController *firstShowMoreDetailViewController;
}
@property (retain) NSArray *arraylist;
@property (strong,nonatomic)FirstShowMoreDetailViewController *firstShowMoreDetailViewController;
@end
MySecondViewController.m
#import "FirstShowMoreViewController.h"
#import "MySecondViewController.h"
#import "MyOneAppDelegate.h"
@implementation FirstShowMoreViewController
@synthesize arraylist;
@synthesize firstShowMoreDetailViewController;
- (void)viewDidLoad
{
[superviewDidLoad];
// Do any additional setup after loading the view.
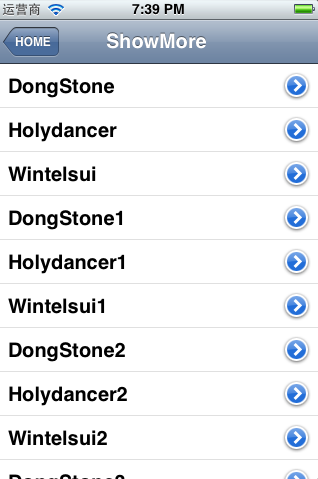
NSArray *arrayforlist = [[NSArrayalloc] initWithObjects:@"DongStone",@"Holydancer",@"Wintelsui",@"DongStone1",@"Holydancer1",@"Wintelsui1",@"DongStone2",@"Holydancer2",@"Wintelsui2",@"DongStone3",@"Holydancer3",@"Wintelsui3",nil];
self.arraylist = arrayforlist;
}
-(NSInteger)tableView:(UITableView *)tableView numberOfRowsInSection:(NSInteger)section{
return [arraylistcount];
}
-(UITableViewCell *)tableView:(UITableView *)tableView cellForRowAtIndexPath:(NSIndexPath *)indexPath{
static NSString *pathindex =@"pathindex";
UITableViewCell *cell = [tableView dequeueReusableCellWithIdentifier:pathindex];
if (cell == nil) {
cell = [[UITableViewCellalloc] initWithStyle:UITableViewCellStyleDefaultreuseIdentifier:pathindex];
}
cell.textLabel.text = [arraylistobjectAtIndex:[indexPath row]];
//设置右侧拓展按键为蓝色圆箭头
cell.accessoryType =UITableViewCellAccessoryDetailDisclosureButton;
return cell;
}
-(void)tableView:(UITableView *)tableView didSelectRowAtIndexPath:(NSIndexPath *)indexPath{
NSString *tempstring = [@"You have selected"stringByAppendingString:[self.arraylistobjectAtIndex:[indexPath row]]];
UIAlertView *alertview = [[UIAlertViewalloc]
initWithTitle:@"simpleness"
message:tempstring
delegate:self
cancelButtonTitle:@"OK"
otherButtonTitles:nil ,nil];
[alertview show];
}
//这是一个新方法,用于处理右侧拓展图标的动作
-(void)tableView:(UITableView *)tableView accessoryButtonTappedForRowWithIndexPath:(NSIndexPath *)indexPath{
if (self.firstShowMoreDetailViewController ==nil) {
self.firstShowMoreDetailViewController = [[FirstShowMoreDetailViewControlleralloc] init];
}
//这是第三级别视图显示内容,在第三级别视图中设置了一个message变量
firstShowMoreDetailViewController.message = [self.arraylistobjectAtIndex:[indexPath row]];
[self.navigationControllerpushViewController:firstShowMoreDetailViewControlleranimated:YES];
}
- (BOOL)shouldAutorotateToInterfaceOrientation:(UIInterfaceOrientation)interfaceOrientation
{
return (interfaceOrientation == UIInterfaceOrientationPortrait);
}
@end
那么跳转到第三级视图,并使message的到我们传的值,在一个UILabel上显示出来,在第三级视图中,我们需要注意的就是,这次我们不是在ViewDidLoad中初始化,而是在-(void)viewWillAppear:(BOOL)animated方法中初始化,这个方法区别在于ViewDidLoad只在视图自一次加载时调用,而viewWillAppear:(BOOL)animated在每次加载页面的时候都会调用;
-(void)viewWillAppear:(BOOL)animated{
    thislabel.text =message;
    [super viewWillAppear:animated];
}
在看一下第一界别视图
MyBaseViewController.h:
#import <UIKit/UIKit.h>
#import "MySecondViewController.h"
#import "FirstShowMoreViewController.h"
@interface MyBaseViewController : UITableViewController
{
    //用于装第二级视图控制器
    NSArray *controllers;
}
@property (strong,nonatomic)NSArray *controllers;
@end
MyBaseViewController.m:
#import "MyBaseViewController.h"

@implementation MyBaseViewController
@synthesize controllers;

- (id)initWithStyle:(UITableViewStyle)style
{
    self = [super initWithStyle:style];
    if (self) {
    }
    return self;
}

- (void)viewDidLoad
{
    [superviewDidLoad];
    //初始化第一个试图的内容
    self.title =@"FirstList";
    UIBarButtonItem *backbutton = [[UIBarButtonItemalloc] initWithTitle:@"HOME"style:UIBarButtonItemStyleBorderedtarget:nilaction:nil];
    self.navigationItem.backBarButtonItem = backbutton;

    NSMutableArray *arrayforcontrollers = [[NSMutableArrayalloc] init];
    //添加FirstShowMore内容
    FirstShowMoreViewController *firstshowmoreviewcontroller = [[FirstShowMoreViewControlleralloc] initWithStyle:UITableViewStylePlain];
    firstshowmoreviewcontroller.title = @"ShowMore";
    firstshowmoreviewcontroller.ImageForRow = [UIImageimageNamed:@"disclosureButtonControllerIcon.png"];
    [arrayforcontrollers addObject:firstshowmoreviewcontroller];
    //在这里我们数组内装的是对象的实例
    self.controllers = arrayforcontrollers;
}

#pragma mark - Table view data source

- (NSInteger)numberOfSectionsInTableView:(UITableView *)tableView
{
    // Return the number of sections.
    return 1;
}

- (NSInteger)tableView:(UITableView *)tableView numberOfRowsInSection:(NSInteger)section
{
    // Return the number of rows in the section.
    return [self.controllerscount];
}

- (UITableViewCell *)tableView:(UITableView *)tableView cellForRowAtIndexPath:(NSIndexPath *)indexPath
{
    static NSString *CellIdentifier =@"Cell";
    UITableViewCell *cell = [tableView dequeueReusableCellWithIdentifier:CellIdentifier];
    if (cell == nil) {
        cell = [[UITableViewCellalloc] initWithStyle:UITableViewCellStyleDefaultreuseIdentifier:CellIdentifier];
    }
    NSUInteger row = [indexPath row];
    MySecondViewController *controller = [self.controllersobjectAtIndex:row];
    cell.textLabel.text = controller.title;
    cell.imageView.image = controller.ImageForRow;
    cell.accessoryType = UITableViewCellAccessoryDisclosureIndicator;

    return cell;
}

#pragma mark - Table view delegate

- (void)tableView:(UITableView *)tableView didSelectRowAtIndexPath:(NSIndexPath *)indexPath
{
//这样我们就把分配下一级视图的事儿交给了MySecondViewController
     MySecondViewController *detailViewController = [self.controllersobjectAtIndex:[indexPath row]];
     [self.navigationControllerpushViewController:detailViewController animated:YES];

}

- (BOOL)shouldAutorotateToInterfaceOrientation:(UIInterfaceOrientation)interfaceOrientation
{
    return (interfaceOrientation == UIInterfaceOrientationPortrait);
}

@end