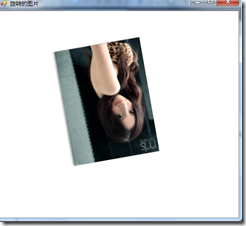
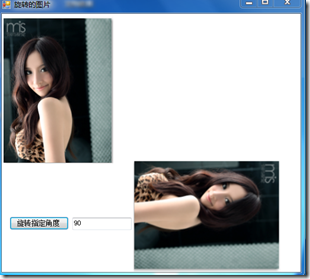
上一个例子我们实现的是百叶窗的效果,这节课的例子我们实现的是旋转的图片效果,哈哈,这节课离不开GDI的操作,各位小菜菜们,我们一起来写我们的代码吧。
下面是效果图,为了实现我们下面的效果,我们必须要知道几个技术点。
TranslateTransform
的使用,我们首先把这张图片的圆心移动到中心位置,也就是说我们要转移中心点
    Bitmap bmp;
    Bitmap background;
    Graphics g;
    private void pictureBox1_Click(object sender, EventArgs e)
    {
        bmp = (Bitmap)pictureBox1.Image.Clone();   //复制到图像
         background = new Bitmap(pictureBox1.Width, pictureBox1.Height, System.Drawing.Imaging.PixelFormat.Format48bppRgb);

        g = Graphics.FromImage(background);
        g.TranslateTransform(background.Width / 2, background.Height / 2);

    }
注意到上面的复制图像的办法,我们以前已经看到过了,下面说的是 System.Drawing.Imaging.PixelFormat.Format48bppRgb
PixelFormat 是一个枚举 指定图像中每个像素的颜色数据的格式。
Indexed
该像素数据包含颜色索引值,这意味着这些值是系统颜色表中颜色的索引,而不是单个颜色值。
Gdi
像素数据包含 GDI 颜色。
Alpha
像素数据包含没有进行过自左乘的 alpha 值。
PAlpha
像素格式包含自左乘的 alpha 值。
Extended
保留。
Canonical
默认像素格式,每像素 32 位。 此格式指定 24 位颜色深度和一个 8 位 alpha 通道。
Undefined
未定义像素格式。
DontCare
没有指定像素格式。
Format1bppIndexed
指定像素格式为每像素 1 位,并指定它使用索引颜色。 因此颜色表中有两种颜色。
Format4bppIndexed
指定格式为每像素 4 位而且已创建索引。
Format8bppIndexed
指定格式为每像素 8 位而且已创建索引。 因此颜色表中有 256 种颜色。
Format16bppGrayScale
像素格式为每像素 16 位。 该颜色信息指定 65536 种灰色调。
Format16bppRgb555
指定格式为每像素 16 位;红色、绿色和蓝色分量各使用 5 位。 剩余的 1 位未使用。
Format16bppRgb565
指定格式为每像素 16 位;红色分量使用 5 位,绿色分量使用 6 位,蓝色分量使用 5 位。
Format16bppArgb1555
像素格式为每像素 16 位。 该颜色信息指定 32,768 种色调,其中 5 位为红色,5 位为绿色,5 位为蓝色,1 位为 alpha。
Format24bppRgb
指定格式为每像素 24 位;红色、绿色和蓝色分量各使用 8 位。
Format32bppRgb
指定格式为每像素 32 位;红色、绿色和蓝色分量各使用 8 位。 剩余的 8 位未使用。
Format32bppArgb
指定格式为每像素 32 位;alpha、红色、绿色和蓝色分量各使用 8 位。
Format32bppPArgb
指定格式为每像素 32 位;alpha、红色、绿色和蓝色分量各使用 8 位。 根据 alpha 分量,对红色、绿色和蓝色分量进行自左乘。
Format48bppRgb
指定格式为每像素 48 位;红色、绿色和蓝色分量各使用 16 位。
Format64bppArgb
指定格式为每像素 64 位;alpha、红色、绿色和蓝色分量各使用 16 位。
Format64bppPArgb
指定格式为每像素 64 位;alpha、红色、绿色和蓝色分量各使用 16 位。 根据 alpha 分量,对红色、绿色和蓝色分量进行自左乘。
Max
此枚举的最大值。
我们采用
Format24bppRgb
即可。
好了,第一步贮备完成了,已经将背景画好了,而且经坐标的原点转移到图片中心位置。下面我们开始自定义自己的 事件
当然最简单的就是用到了,timer控件 ,这里我自己声明一个全局的
Timer tm;
tm = new Timer();
然后
tm.Interval = 100;
tm.Tick += new EventHandler(tm_Tick);
tm.Enabled = true;
void tm_Tick(object sender, EventArgs e)
{
    g.Clear(Color.White);
    g.RotateTransform(10.0f);
    g.DrawImage(bmp, -bmp.Width / 2, -bmp.Height / 2);

    Graphics gn = pictureBox1.CreateGraphics();
    gn.DrawImage(background, 0, 0);

}
首先是清空PictureBox里面所有东东,为下面重新绘制做准备。
g.RotateTransform(10.0f);
每一次Time——Tick事件,将图片旋转10度。
g.DrawImage(bmp, -bmp.Width / 2, -bmp.Height / 2);
Graphics gn = pictureBox1.CreateGraphics();
gn.DrawImage(background, 0, 0);
将图片与背景一起完成。
好了下面我们实现的是,按指定角度旋转图片。这个需要一个文本框,用来输入旋转角度。
首先,将整个窗体都变成一张画布。
g = this.CreateGraphics();
g.Clear(Color.White);
然后我们得到 图片
Image img = pictureBox1.Image;
得到活动窗体的 长和宽
PointF center = new PointF(this.Size.Width / 2, Size.Height / 2);
然后画一个矩形 得到这个矩形的中心点坐标
RectangleF re = new RectangleF(center.X, center.Y, img.Width, img.Height);

PointF pCenter = new PointF(re.X + re.Width / 2, re.Y + re.Height / 2);
//移动到矩形中心点坐标
g.TranslateTransform(pCenter.X, pCenter.Y);
//旋转指定的角度
g.RotateTransform(Convert.ToInt32(txtRotate.Text));
//准备画图  旋转之后,坐标变负
g.TranslateTransform(-pCenter.X, -pCenter.Y);
//在矩形中绘制图形
g.DrawImage(img, re);
//重置坐标原点
g.ResetTransform();
好了,这节课程的小例子结束了。欢迎大家拍砖
哈哈哈。

