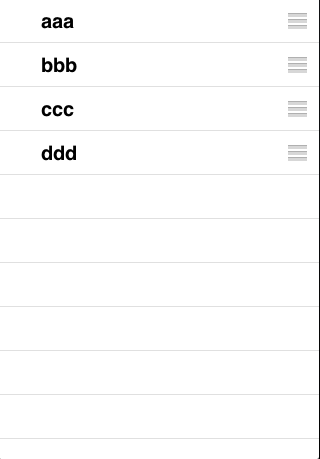
移动:
首先要将存储数据的NSArray改为NSMutableArray,因为前者是不可变的。在头文件中:
@interface RootViewController : UITableViewController <UITableViewDelegate,UITableViewDataSource>{
NSMutableArray *dataItems;
在m文件中:
dataItems= [[NSMutableArray alloc] initWithObjects:@"张三",@"李四",nil];
然后,增加导航条右侧的按钮。先写出点击按钮的函数:
-(IBAction)toggleMove{
[self.tableView setEditing:!self.tableView.editing animated:YES];
}
下面,声明按钮并关联上述函数:
- (void)viewDidLoad {
dataItems= [[NSMutableArray alloc] initWithObjects:@"张三",@"李四",nil];
self.navigationItem.rightBarButtonItem=[[UIBarButtonItem alloc] initWithTitle:@"移动"
style:UIBarButtonItemStyleBordered
target:self
action:@selector(toggleMove)];
[super viewDidLoad];
}
其实就是增加一句话。
添加有关显示风格等的函数:
-(UITableViewCellEditingStyle)tableView:(UITableView *)tableView editingStyleForRowAtIndexPath:(NSIndexPath *)indexPath{
return UITableViewCellEditingStyleNone;
}
-(BOOL)tableView:(UITableView *)tableView canMoveRowAtIndexPath:(NSIndexPath *)indexPath{
return YES;
}
其中,后者(canMoveRowAtIndexPath)如果不写,将是删除而不是移动。
在原有生成表条目的函数中增加一句话,用于显示右侧的控件:
- (UITableViewCell *)tableView:(UITableView *)tableView cellForRowAtIndexPath:(NSIndexPath *)indexPath {
static NSString *CellIdentifier = @"Cell";
UITableViewCell *cell = [tableView dequeueReusableCellWithIdentifier:CellIdentifier];
if (cell == nil) {
cell = [[[UITableViewCell alloc] initWithStyle:UITableViewCellStyleDefault reuseIdentifier:CellIdentifier] autorelease];
cell.showsReorderControl=YES;
}
下面是最关键的函数,在移动表条目时回调的函数:
-(void)tableView:(UITableView *)tableView moveRowAtIndexPath:(NSIndexPath *) fromIndexPath
toIndexPath:(NSIndexPath *)toIndexPath{
id object=[[dataItems objectAtIndex:[fromIndexPath row]] retain];
[dataItems removeObjectAtIndex:[fromIndexPath row]];
[dataItems insertObject:object atIndex:[toIndexPath row]];
[object release];
}
这样就可以实现上述的效果了,不过会出现这样的警告日志:
2010-10-13 22:42:47.220 NavTest[77449:207] WARNING: Using legacy cell layout due to delegate implementation of tableView:accessoryTypeForRowWithIndexPath: in <RootViewController: 0x5c04150>. Please remove your implementation
of this method and set the cell properties accessoryType and/or editingAccessoryType to move to the new cell layout behavior. This method will no longer be called in a future release.
因为accessoryTypeForRowWithIndexPath函数已经不建议使用了,要替换成:
// Customize the appearance of table view cells.
- (UITableViewCell *)tableView:(UITableView *)tableView cellForRowAtIndexPath:(NSIndexPath *)indexPath {
static NSString *CellIdentifier = @"Cell";
UITableViewCell *cell = [tableView dequeueReusableCellWithIdentifier:CellIdentifier];
if (cell == nil) {
cell = [[[UITableViewCell alloc] initWithStyle:UITableViewCellStyleDefault reuseIdentifier:CellIdentifier] autorelease];
cell.showsReorderControl=YES;
cell.accessoryType=UITableViewCellAccessoryDetailDisclosureButton;
}
NSUInteger row=[indexPath row];
cell.textLabel.text=[dataItems objectAtIndex:row];
return cell;}
删除:
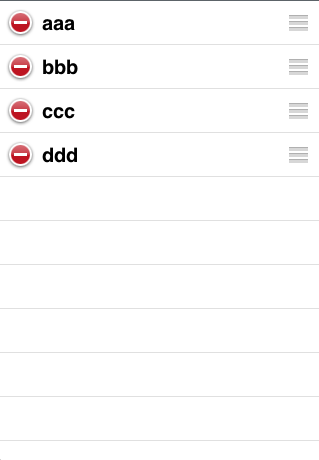
删除的则更简单了。
其button的action与上面一样,
只要实现一个委托方法:
- (void)tableView:(UITableView *)tableView
commitEditingStyle:(UITableViewCellEditingStyle)editingStyle
forRowAtIndexPath:(NSIndexPath *)indexPath {

    NSUInteger row = [indexPath row];
    [self.list removeObjectAtIndex:row];
    [tableView deleteRowsAtIndexPaths:[NSArray arrayWithObject:indexPath]
                     withRowAnimation:UITableViewRowAnimationAutomatic];
}
也可以将二者结合起来,实现上面的4哥委托方法就行。只是要注意在editingStyleForRowAtIndexPath 方法种,返回UITableViewCellEditingStyleDelete