Android 横屏竖屏的切换
1、准备环境
对模拟器,只要“Ctrl+F12“,就可以可以实现竖屏(portrait)和横屏(landscape)的切换。
2、UI的屏幕切换实现
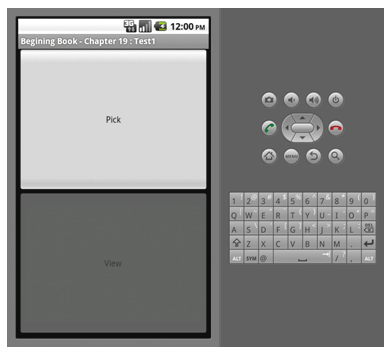
下面一个简单的例子,如图。
 |
 |
我们需要写两个Android XML文件,假定文件为chapter_19_test1.xml,放在常规目录位置layout/内容如下:
- <?xml version="1.0" encoding="utf-8"?>
- <LinearLayout xmlns:android="http://schemas.android.com/apk/res/android"
- android:orientation="vertical"
- android:layout_width="fill_parent"
- android:layout_height="fill_parent">
- <Button android:id="@+id/c19_pick"
- android:layout_width="fill_parent"
- android:layout_height="fill_parent"
- android:layout_weight="1"
- android:text="Pick"
- android:enabled="true" />
- <Button android:id="@+id/c19_view"
- android:layout_width="fill_parent"
- android:layout_height="fill_parent"
- android:layout_weight="1"
- android:text="View"
- android:enabled="false" />
- </LinearLayout>
<?xml version="1.0" encoding="utf-8"?>
<LinearLayout  xmlns:android="http://schemas.android.com/apk/res/android"
  android:orientation="vertical"
  android:layout_width="fill_parent"
  android:layout_height="fill_parent">
	<Button android:id="@+id/c19_pick"
	  android:layout_width="fill_parent"
	  android:layout_height="fill_parent"
	  android:layout_weight="1"
	  android:text="Pick"
	  android:enabled="true" />
	<Button android:id="@+id/c19_view"
	  android:layout_width="fill_parent"
	  android:layout_height="fill_parent"
	  android:layout_weight="1"
	  android:text="View"
	  android:enabled="false" />
</LinearLayout>
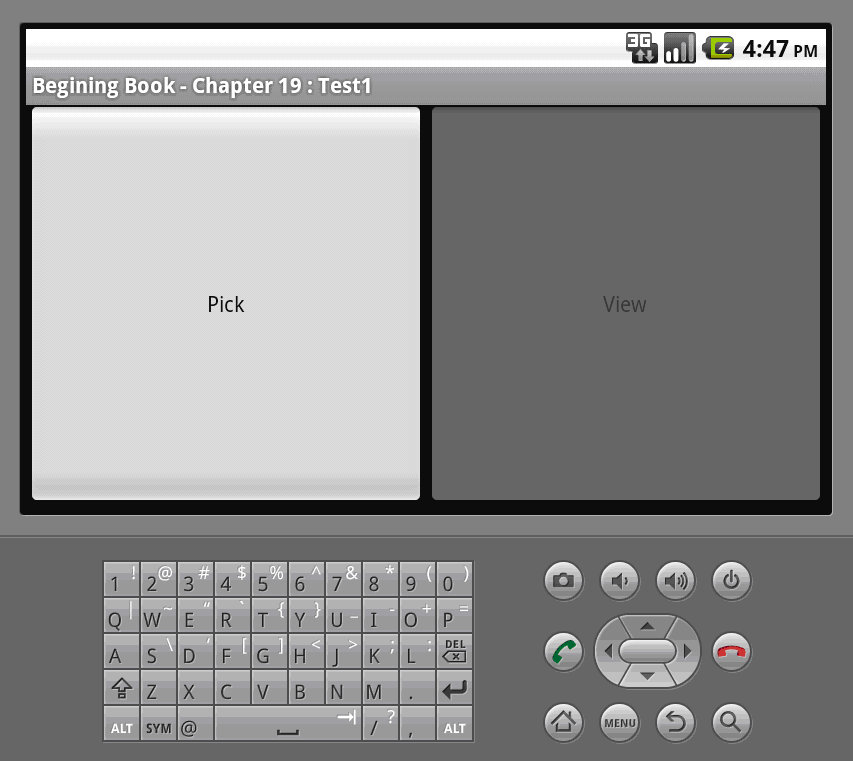
另一个位于layout-land/目录下面,文件名称一样,这里是landsapce的排版,简单地,我们只作少许改动,将LinearLayout中的android:orientation="vertical",修改为android:orientation="horizontal",这样就可以了。
3、切换中出现什么事情
Is it so easy?在Android,关于layout widget,系统会根据你的xml文件自动进行屏幕旋转,选择正确的xml文件来进行布局。很智能吧?是的,但是仅此而已。我们做个实验:在上面xml的基础上,每按一次pick按钮,计数器testNum就加一,为了直观简单,testNum的值通过System.out打印处理,并在Button上直接显示。测试代码如下:
- public class Chapter19Test1 extends Activity{
- private int testNum = 0; //实验:跟踪testNum
- @Override
- protected void onCreate(Bundle savedInstanceState) {
- super.onCreate(savedInstanceState);
- setContentView(R.layout.chapter_19_test1);
- Button pickButton = (Button)findViewById(R.id.c19_pick);
- pickButton.setText("Pick : " + testNum);
- pickButton.setOnClickListener(new View.OnClickListener() {
- /*每按pick按键一次,计数器testNum就加一*/
- public void onClick(View v) {
- testNum ++;
- System.out.println("Pick : " + testNum);
- ((Button)v).setText("Pick : " + testNum);
- }
- });
- viewButton.setEnabled(contact != null);
- }
- }
public class Chapter19Test1 extends Activity{
    private int testNum = 0; //实验:跟踪testNum

	@Override
	protected void onCreate(Bundle savedInstanceState) {
		super.onCreate(savedInstanceState);
		setContentView(R.layout.chapter_19_test1);

		Button pickButton = (Button)findViewById(R.id.c19_pick);
		pickButton.setText("Pick : " + testNum);

		pickButton.setOnClickListener(new View.OnClickListener() {
			/*每按pick按键一次,计数器testNum就加一*/
			public void onClick(View v) {
				testNum ++;
				System.out.println("Pick : " + testNum);
				((Button)v).setText("Pick : " + testNum);
			}
		});

		viewButton.setEnabled(contact != null);
	}

}
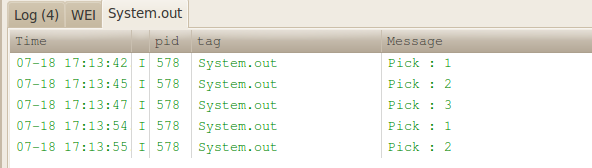
我们在竖屏的情况下按pick的按键,三次后,然后通过"ctrl+F12"从竖屏转为横屏,再按,发现testNum没有按照与其,继续计数,而是重新开始计算,而我们希望的是能保留原来的状。在屏幕的切换中Android会destroy并re-create我们的activity。这就意味这你需要保存你的数据并且在切换的时候从保存的数据中恢复状态。
4、保存数据
我们使用onSaveInstanceState()来进行数据保存,由于是re-create,在屏幕转换时会触发onCreate(),也可以在onRestoreInstanceState()中对数据进行恢复。
- protected void onCreate(Bundle savedInstanceState) {
- ... ...
- Button pickButton = (Button)findViewById(R.id.c19_pick);
- /*从Bundle中获取保存的数据,进行恢复*/
- if(savedInstanceState != null){
- testNum = savedInstanceState.getInt("count");
- }
- pickButton.setText("Pick : " + testNum);
- pickButton.setOnClickListener(new View.OnClickListener() {
- ......
- });
- }
- @Override
- /*通过onSaveInstanceState()来进行数据保存,存放如Bundle中。*/
- protected void onSaveInstanceState(Bundle outState) {
- // TODO Auto-generated method stub
- super.onSaveInstanceState(outState);
- outState.putInt("count", testNum);
- }
protected void onCreate(Bundle savedInstanceState) {
         ... ...
	Button pickButton = (Button)findViewById(R.id.c19_pick);
	/*从Bundle中获取保存的数据,进行恢复*/
	if(savedInstanceState != null){
		testNum = savedInstanceState.getInt("count");
	}
	pickButton.setText("Pick : " + testNum);

	pickButton.setOnClickListener(new View.OnClickListener() {
	      ......
	});
}

@Override
/*通过onSaveInstanceState()来进行数据保存,存放如Bundle中。*/
protected void onSaveInstanceState(Bundle outState) {
	// TODO Auto-generated method stub
	super.onSaveInstanceState(outState);
	outState.putInt("count", testNum);
}
5、稍有趣一点的例子
在上面的例子中,我们按pick按钮,采用Intent方式进入contact列表,在列表中选择某个contact,并返回。通过startActivityForResult的调用方式,我们可以获得返回值。按View按钮,这可以显示该contact的详细信息。在这个例子中,我们学习下面的几个内容:
1)如何调用contact列表new Intent(Intent.ACTION_PICK, ContactsContract.Contacts.CONTENT_URI);,如何调用查看某个contact的详细内容new Intent(Intent.ACTION_VIEW,contact)
2)如何调用带返回的intent:startActivityForResult(intent,requestCode);
3)在横竖屏切换中,复习保存数据(contact)并恢复原来状态。值得注意的是:下面的处理并不仅仅是为了横竖屏,还包括其他的恢复,例如因为电池能源太低而造成的activity的close。
- public class Chapter19Test1 extends Activity{
- static final int PICK_REQUEST=1000;
- private Button viewButton = null;
- private Uri contact = null;
- protected void onCreate(Bundle savedInstanceState) {
- ... ...
- pickButton.setOnClickListener(new View.OnClickListener() {
- /* 下面给1)如何调用contact列表;2)如何调用代返回值的intent */
- public void onClick(View v) {
- Intent intent = new Intent(Intent.ACTION_PICK, ContactsContract.Contacts.CONTENT_URI);
- startActivityForResult(intent, PICK_REQUEST);
- }
- });
- viewButton.setOnClickListener(new View.OnClickListener() {
- /* 1)如何调用显示某个contact的详细内容*/
- public void onClick(View v) {
- startActivity(new Intent(Intent.ACTION_VIEW,contact));
- }
- });
- restoreMe(savedInstanceState);
- viewButton.setEnabled(contact != null);
- }
- @Override
- /* 2)如何获取intent的返回数值,通过requestCode的匹配,确定是否我们所需*/
- protected void onActivityResult(int requestCode, int resultCode, Intent data) {
- super.onActivityResult(requestCode, resultCode, data);
- if(requestCode == PICK_REQUEST){
- if(resultCode == RESULT_OK){
- contact = data.getData();
- viewButton.setEnabled(true);
- }
- }
- }
- @Override
- /* 3)用于屏幕旋转等情况的数据保存,这是系统自动调用的。*/
- protected void onSaveInstanceState(Bundle outState) {
- super.onSaveInstanceState(outState);
- if(contact != null){
- outState.putString("contact", contact.toString());
- }
- }
- /* 3)在onCreate中调用,用与屏幕旋转时,恢复数据,其实还包括了其他的情况,例如电池电能太低*/
- private void restoreMe(Bundle state){
- contact = null;
- if(state != null){
- String contactUri = state.getString("contact");
- if(contactUri != null){
- contact = Uri.parse(contactUri);
- }
- }
- }
- }
public class Chapter19Test1 extends Activity{
	static final int PICK_REQUEST=1000;

	private Button viewButton = null;
	private Uri contact = null;

	protected void onCreate(Bundle savedInstanceState) {
		... ...
		pickButton.setOnClickListener(new View.OnClickListener() {
			/* 下面给1)如何调用contact列表;2)如何调用代返回值的intent */
			public void onClick(View v) {
				Intent intent = new Intent(Intent.ACTION_PICK, ContactsContract.Contacts.CONTENT_URI);
				startActivityForResult(intent, PICK_REQUEST);
			}
		});

		viewButton.setOnClickListener(new View.OnClickListener() {
			/* 1)如何调用显示某个contact的详细内容*/
			public void onClick(View v) {
				startActivity(new Intent(Intent.ACTION_VIEW,contact));
			}
		});

		restoreMe(savedInstanceState);
		viewButton.setEnabled(contact != null);
	}

	@Override
	/* 2)如何获取intent的返回数值,通过requestCode的匹配,确定是否我们所需*/
	protected void onActivityResult(int requestCode, int resultCode, Intent data) {
		super.onActivityResult(requestCode, resultCode, data);
		if(requestCode == PICK_REQUEST){
			if(resultCode == RESULT_OK){
				contact = data.getData();
				viewButton.setEnabled(true);
			}
		}
	}

	@Override
	/* 3)用于屏幕旋转等情况的数据保存,这是系统自动调用的。*/
	protected void onSaveInstanceState(Bundle outState) {
		super.onSaveInstanceState(outState);
		if(contact != null){
			outState.putString("contact", contact.toString());
		}
	}

	/* 3)在onCreate中调用,用与屏幕旋转时,恢复数据,其实还包括了其他的情况,例如电池电能太低*/
	private void restoreMe(Bundle  state){
		contact = null;
		if(state != null){
			String contactUri = state.getString("contact");
			if(contactUri != null){
				contact = Uri.parse(contactUri);
			}
		}
	}

}
6、用onSaveInstanceState()保存数据的局限和替换方式
在例子中,使用了 onSaveInstanceState()来保存数据,这个调用不仅仅是在横屏竖屏的切换,同时也在其他引起中断的处理,例如低memory,因此数据保存不仅是串行进行的同时和当前之执行的进程无关。局限在于只能通过bundle来保存。
在一些activty的情况下,这样处理是没有问题,但是另一些,例如在线聊天,我们无法通过bundle将object(例如socket)保存起来,如果仅仅保存socket的信息(ip地址、端口)是没有意义的,也就是在横屏和竖屏的切换会导致连接的断开和重连接。显然不是我们期待的。
解决方法是用onRetainNonConfigurationInstance()来替代onSaveInstanceState()。用它来保存object,并通过getLastNonConfigurationInstance()来获取。这样我们可以保存socket,thread等等。上面的例子,可以修订如下:
- public class Chapter19Test2 extends Activity{
- ... ...
- @Override
- protected void onCreate(Bundle savedInstanceState) {
- ... ...
- /* 恢复数据 */
- restoreMe();
- ... ...
- }
- ... ...
- @Override
- /*通过onRetainNonConfigurationInstance()直接保存object,在之前的例子是保存了Uri的toString()信息*/
- public Object onRetainNonConfigurationInstance() {
- return contact;
- }
- /* 恢复数据,直接获得对象*/
- private void restoreMe(){
- contact = null;
- if(getLastNonConfigurationInstance()!= null){
- contact = (Uri)getLastNonConfigurationInstance();
- }
- }
- }